
How to Hack an SNES Classic to Add Hundreds of Games
The Super Nintendo Entertainment System (SNES) and the Nintendo Entertainment System (NES) are two of the hottest retro gaming devices that have hit store shelves when they were reintroduced. These miniaturized versions of the ‘80s and ‘90s classic consoles are preloaded with pixel-perfect nostalgic games.
Unfortunately, these are hard to come by but you can easily purchase one off of Ebay.
But with only 21 prepackaged hits, the old-school experience can be very limited for players. Here’s an SNES and NES Classic hack that will allow you to add hundreds of games to this classic console.
After you learn how to hack your console, be ready to add games from other platforms such as NES, Sega, Gameboy, Atari, and many more.
Why SNES?
When I first looked at these two gaming consoles in the store, I wanted to purchase both because I enjoy playing games on both SNES and NES. The reason why I chose to hack the SNES Classic is due to its two included controllers.
The NES Classic only comes with one controller and has limited buttons. The SNES Classic Controller, on the other hand, includes the additional buttons so we can enjoy more games on the device.
Yes, you can install SNES games on the hacked NES Classic but there’s a downside: the limited buttons on the game-pad will make it impossible to play some of those titles.
As of this article, the SNES Classic costs $20 more than the NES Classic, which is well worth the extra money in my opinion.
BE CAREFUL…
Your online activity is actively tracked by your Internet Service Provider, app/addon devs, and government through your identifying IP address.
Stream anonymously by using Quad VPN.
Quad VPN will encrypt your connection to the Internet and mask your IP address so you will become anonymous.
EXCLUSIVE DISCOUNT – SAVE 77% ON Quad VPN
Quad VPN backs their service with a 30-day money back guarantee.
Quad VPN allows you to use your account on unlimited Internet-connected devices
And yes, you can install retro games on Firestick or Raspberry Pi but the original controllers that come with these consoles and the simple interface make these a huge hit.
![]() IMPORTANT: If you’re trying to install unverified apps into your Firestick or Fire TV from the Amazon App Store, you can only complete it by side-loading or installing anything into your device without using the official app-distribution method. I recommend using a VPN to install such apps. Click this link to learn how to install a VPN for Firestick, Fire TV, Fire TV Cube.
IMPORTANT: If you’re trying to install unverified apps into your Firestick or Fire TV from the Amazon App Store, you can only complete it by side-loading or installing anything into your device without using the official app-distribution method. I recommend using a VPN to install such apps. Click this link to learn how to install a VPN for Firestick, Fire TV, Fire TV Cube.
What Games Can Be Added in an SNES Classic Hack?
In this tutorial hack, you can install the following additional games to your SNES Classic:
Chrono Trigger
Donkey Kong Country 2
Donkey Kong Country 3
Final Fight 3
Front Mission
Ken Griffey Jr. Presents Major League Baseball
Mortal Kombat II
NBA Jam – Tournament Edition
NHL 96
Pocky & Rocky
Rock n’ Roll Racing
Secret of Mana
Space Megaforce
Super Mario All-Stars
Super Mario RPG – Legend of the Seven Stars
Super Mario World 2
Super Off Road
Super Street Fighter II
Teenage Mutant Ninja Turtles IV – Turtles in Time
Terranigma
Tetris Attack
Top Gear
Top Gear 2
Wild Guns
Plus all 30 Nintendo games found on NES Classic!
SNES Hack Requirements
Before you begin with the hack, you must prepare the following:
A Windows computer to perform this mod. The software that we use will only work with Windows. For those of you using Mac, keep in mind that you can dual-boot with a program called Boot Camp.
ROMs (games) that you would like to load onto the device. If you haven’t downloaded your ROMs yet, a simple Google search for “No Intro Rom Set” will point you in the proper direction.
NOTE: Due to legal reasons, I can’t link to these download locations.
In the video, I created a subfolder in the ROMs folder called “Extras for Mini” that contains the folders “NES Extras for Mini” and “SNES Extras for Mini”. These folders contain the games for each console so it will be easier to identify them when loading into our hacked SNES.
Video Tutorial
Click on the video below to watch the tutorial.
The links mentioned in the video can be accessed through the following:
You can also find these consoles in Best Buy, GameStop and other tech-related stores.
How to Hack an SNES Classic to Add More Games
The detailed steps below outline the instructions on the video above.
Step 1
Plug the USB cord from your SNES Classic into an available USB slot on PC.
NOTE: Make sure that the SNES Classic is turned OFF when plugging in the USB cord.
Step 2
Download and extract the Hakchi CE Application Tool by clicking here. Under the Modification Categories section, click Hakchi Application Tool.

Step 3
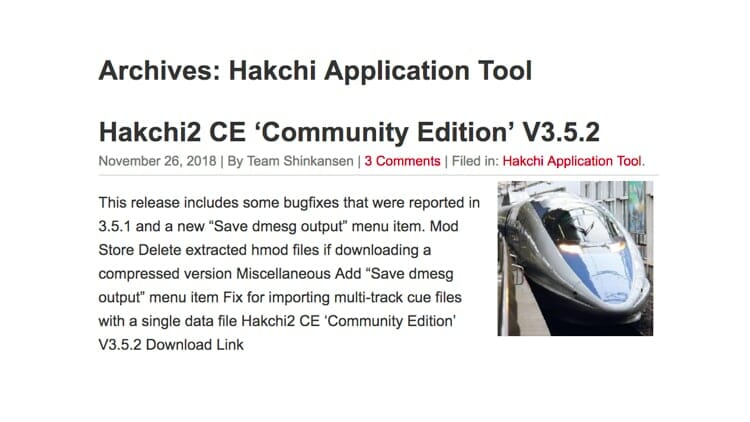
Select the latest Hakchi CE Application Tool version from the list. In the image below, the “Hakchi2 CE ‘Community Edition’ V3.5.2” is shown.
It will be downloaded as a .zip file.
Step 4
Locate the downloaded .zip file and extract the contents. To do this, right click on the .zip file to display the commands and left click on Extract All….
NOTE: If your computer doesn’t present this option, download the free application 7-Zip to extract the file.

Step 5
Once the file is extracted, it will create a new folder. Delete the .zip file so that only the new Hakchi CE folder will remain together with your ROMs folder.
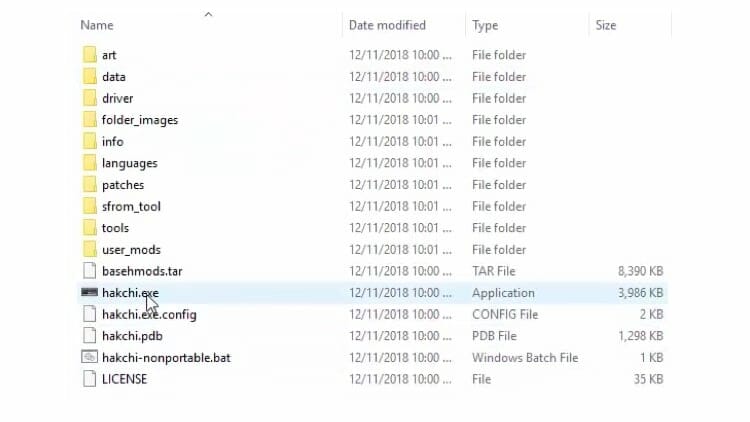
Step 6
Open the Hakchi CE folder and right click on the file with an .exe extension. In the image below, the file “hakchi.exe” is selected.
NOTE: If your list does not show file extensions, find and click the file with the name, “hakchi”.
Step 7
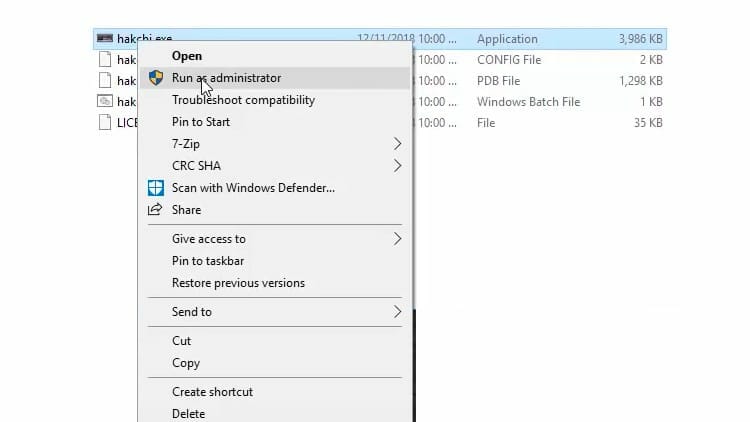
Select Run as administrator.
Step 8
The welcome message from Hakchi 2 will pop up. Click Ok.

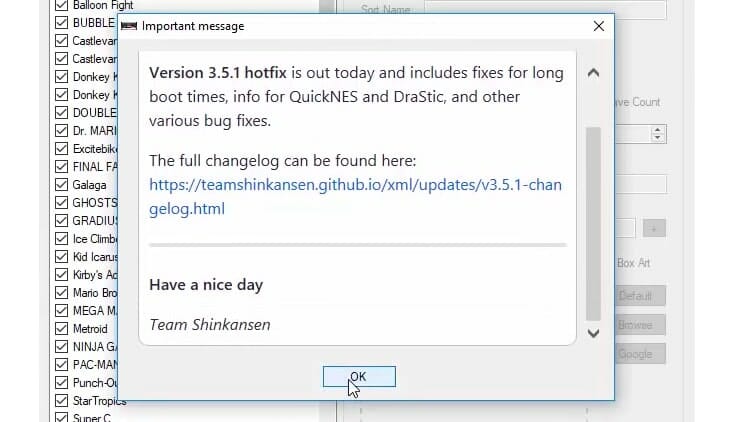
Step 9
Another message will be displayed. Click Ok.
Step 10
On the Current games collection dropdown menu, select Super NES and your region. In the image below, Super NES (USA) is selected.

The original games that are currently loaded on SNES will show up.

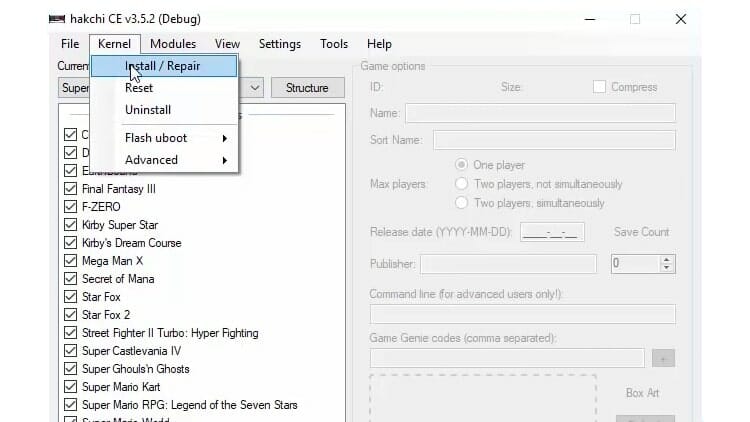
Step 11
On the Hakchi CE main menu, click Kernel > Install / Repair.
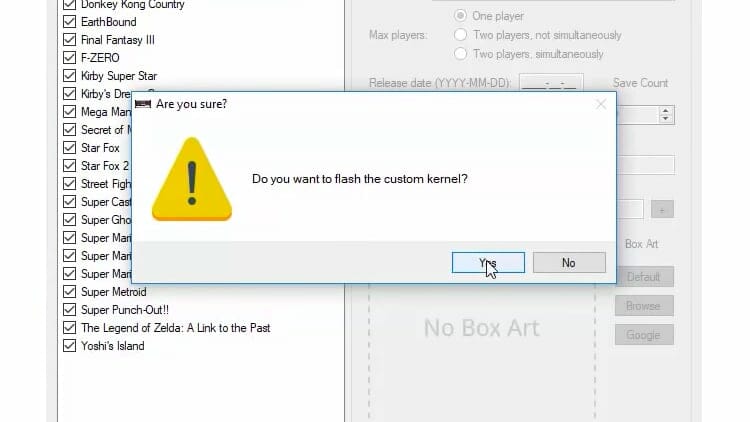
Step 12
A pop-up message that asks, “Do you want to flash the customer kernel?” will appear. Click Yes.
A set of instructions will then be displayed.
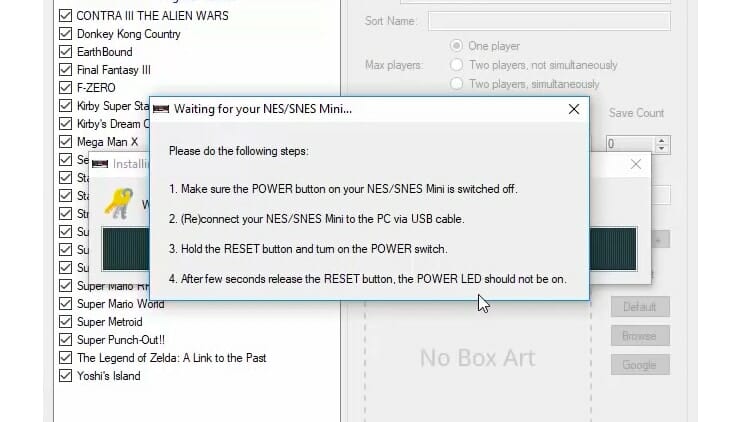
Step 13
On your SNES Classic, hold the RESET button and turn ON the power switch. After a few seconds, release the RESET button. Remember that the POWER LED should NOT be turned ON.
The kernel will now be uploaded.
NOTE: Depending on your operating system, you may need to click on a button that requires you to install the driver.

Do not turn OFF the device or unplug the cord while the process is being completed.

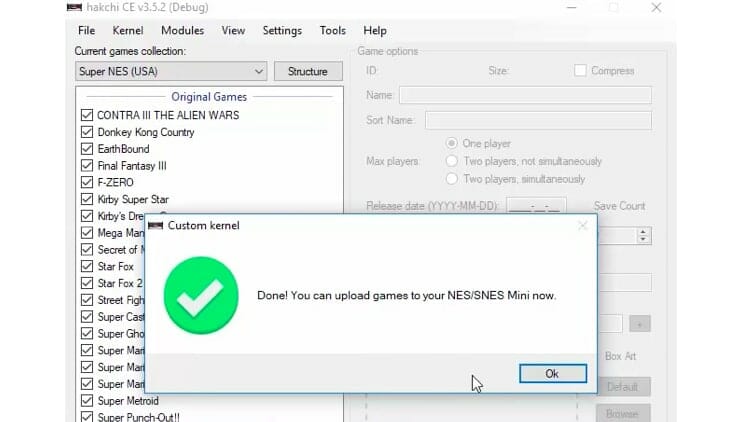
Step 14
A pop-up message that states, “Done! You can upload games to your NES/SNES Mini now.” will appear. Click Ok.
Step 15
Wait for local original games cache to be updated.

Click Ok once done.

The green button ![]() at the bottom left corner indicates that the process has been completed successfully. In the future, whenever you plug the device into the computer with the USB cord and then turn the power ON on your device, you should see the green button appear after approximately 20 seconds when it has connected to your computer.
at the bottom left corner indicates that the process has been completed successfully. In the future, whenever you plug the device into the computer with the USB cord and then turn the power ON on your device, you should see the green button appear after approximately 20 seconds when it has connected to your computer.
In addition, when you hook up your SNES to your computer, you no longer need to go through Step 11 (holding and hitting the console’s RESET and POWER buttons, respectively) since this only applies to a new device being installed. Just plug the USB drive into an available USB slot on the computer and push the power button to connect the device to the computer.
Step 16
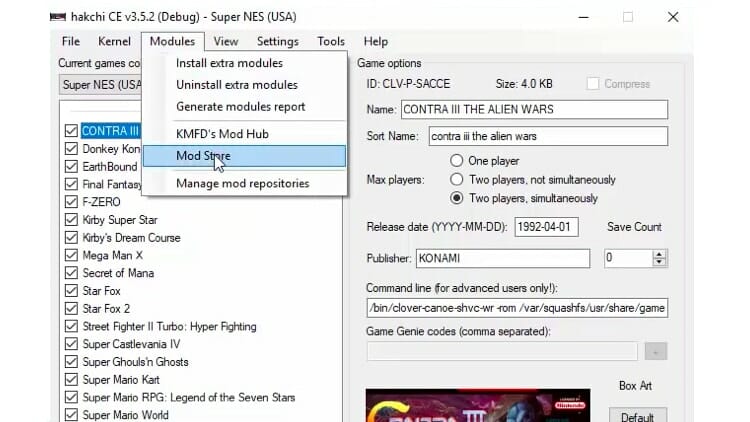
Install emulators to allow you to play games that the SNES is not capable of playing.
NOTE: The Clover emulator on SNES will run any type of ROM games. However, keep in mind that there may be some games that will not work properly. To fix this issue, install the emulators for the original Nintendo as well as for any SNES games that won’t play by default.
On the Hakchi CE main menu, click Modules > Mod Store.
Step 17
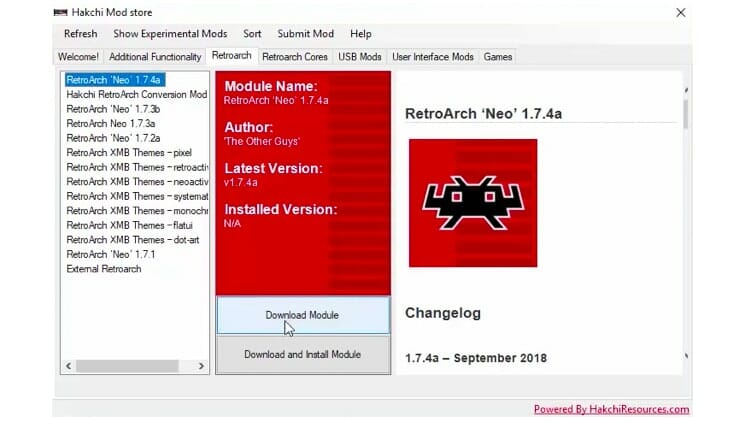
Click the Retroarch menu.

Step 18
Highlight the latest release of RetroArch ‘Neo’. In the image below, “RetroArch ‘Neo’ 1.7.4a” is selected. Then click Download Module.
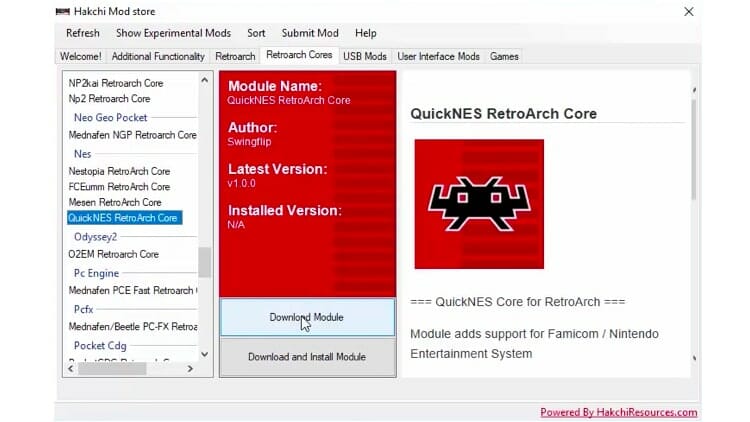
Step 19
Install the specific cores or individual emulators that will play the games. Click Retroarch Cores then highlight an NES emulator from the list. In the image below, “Quick NES RetroArch Core” is selected.

Step 20
Click Download Module.
Step 21
Highlight an SNES core. In the image below, “SNES9x2005 Retroarch Core” is selected. Then click Download Module.
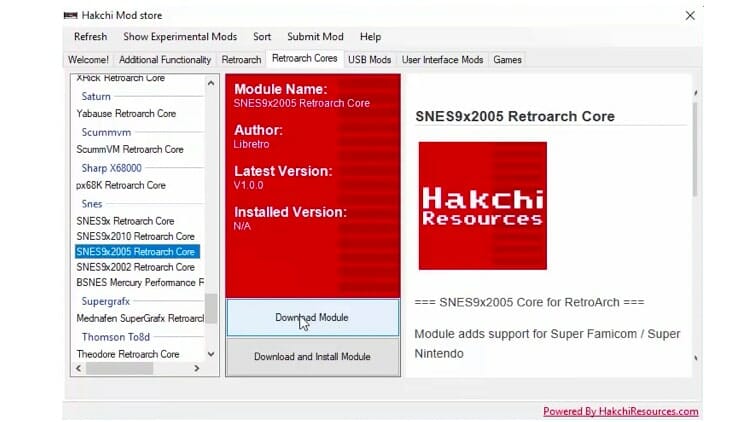
NOTE: If you will be using another gaming system, you should download the specific emulator at this stage.
When the download is complete, close the window.
Step 22
Begin installing the modules by clicking Modules > Install extra modules.

Step 23
Tick the boxes beside each of the core or emulator that you have recently downloaded. Then click OK.

Step 24
Wait for the installation to be completed.

Then click Ok.

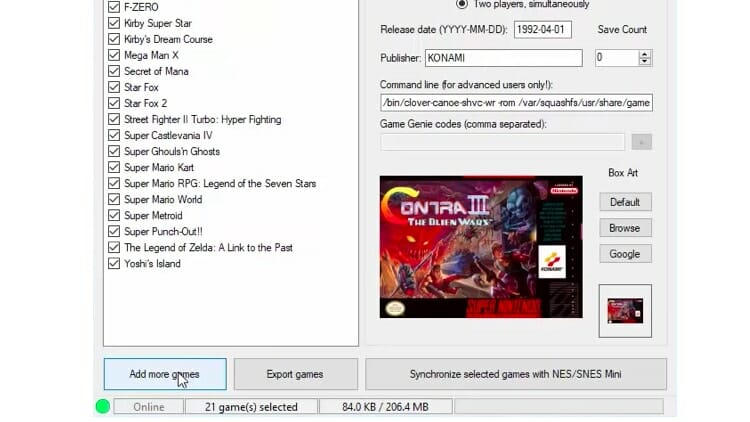
Step 25
Click Add more games.
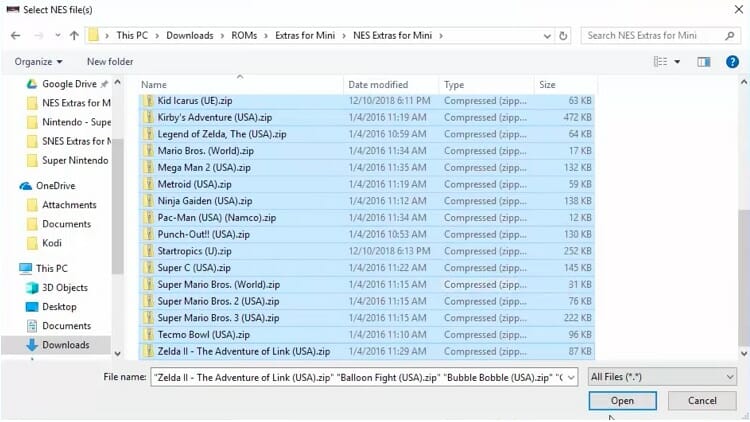
Step 26
Go to the folder where you saved your games then select all the files. Click Open.
In the image below, NES games are selected.
Wait for the games to be installed.

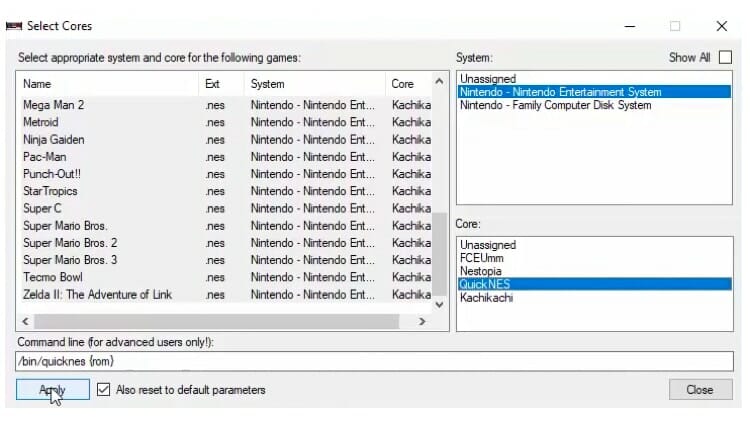
Step 27
Change the default emulator for NES games to the “Quick NES RetroArch Core” that was installed earlier. Highlight all the games with the default emulator. Then right click on these games and click on Select emulation core….

Step 28
A new pop-up window will appear. Highlight all the games and in the Core section, select “Quick NES” then click Apply.
Step 29
Click Close.
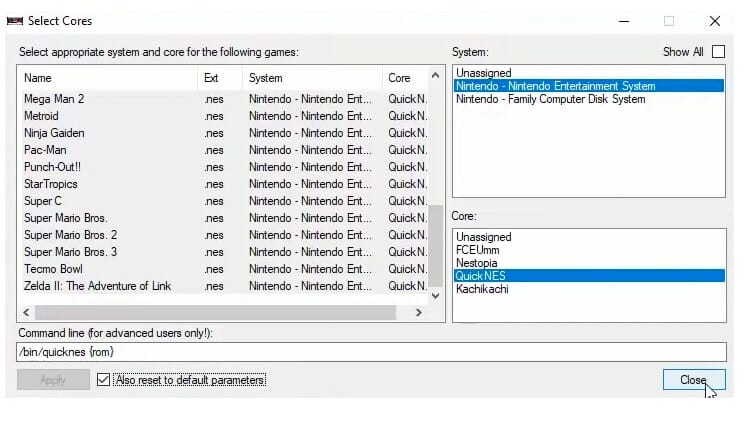
The selected games will now have the Quick NES emulator as can be seen on the command line bar.

Step 30
Repeat Steps 23 to 24 for SNES games.
Step 31
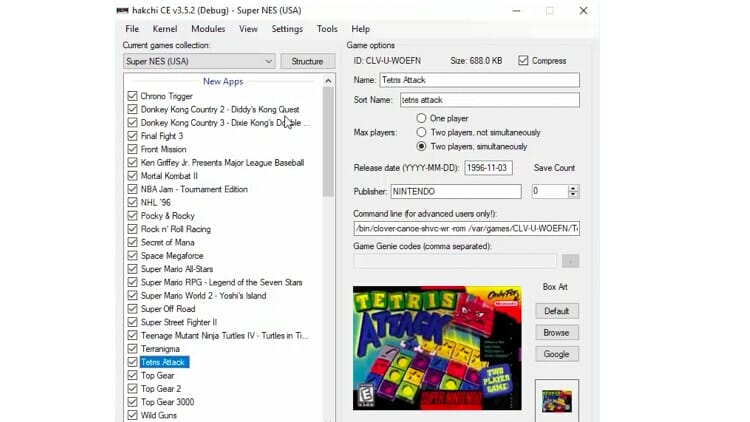
When the new emulation core has been set for the games, highlight all the games under the New Apps section. Right click on the files and click Download box art for selected games.

Step 32
Click Ok once completed.

Each game’s box art will now appear.
Step 33
From the list of games, scroll down to the Custom Games section and repeat Steps 31 to 32.
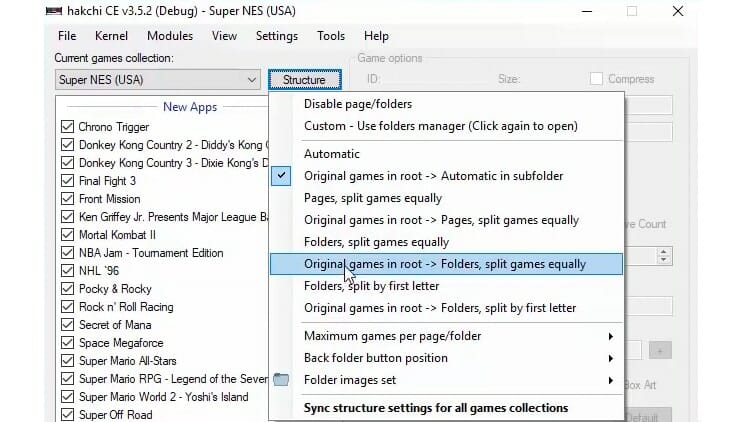
Step 34
Manage the organization of your games by splitting them into folders. Click Structure > Original games in root – > Folders, split games equally.
NOTE: You can always go back to this step to change the organization of your games.
Step 35
Click Synchronize selected games with NES/SNES Mini.
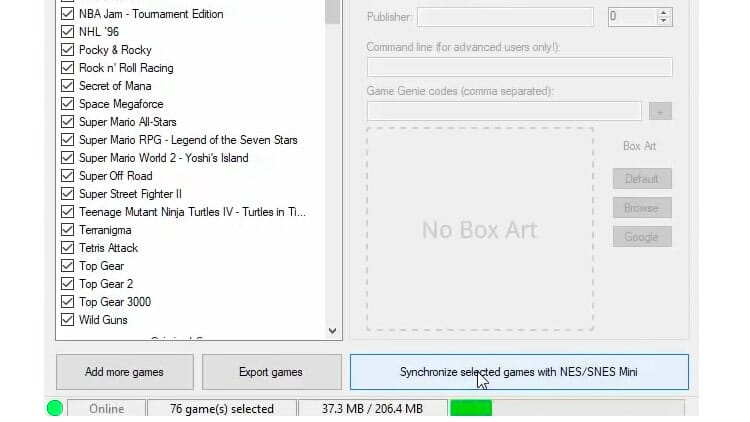
Step 36
Wait for the games to be synchronized then click Ok.

Step 37
Turn OFF your SNES Classic and unplug the USB cord. Then plug the cord into the power adaptor, plug the HDMI cable and boot the device on your TV.
NOTE: The green button at the bottom left corner of the Hakchi CE window will now turn red ![]() .
.
How to Search for Your Newly Added Games
Step 1
Locate the folder that contains the newly added games. Highlight the folder and hit the A button on the controller.

Step 2
The folders containing the newly added games as well as the original games will be displayed.
NOTE: The total number of games will be split in equal folders. Therefore, the more games you installed, the more folders will appear.

Step 3
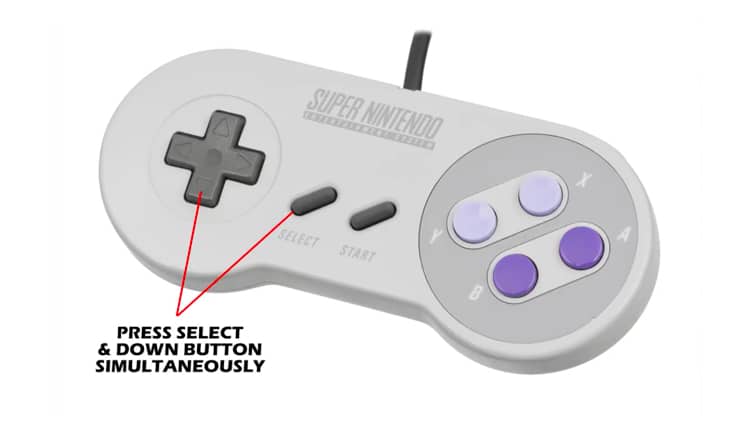
If you want to save your game, press the SELECT and down buttons on your controller simultaneously.
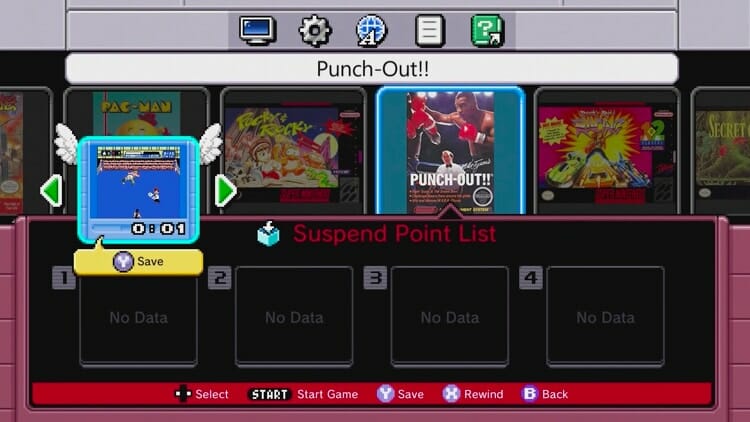
Step 4
To save your game, press the down button and hit the Y button on your controller.
Step 5
To resume playing, highlight the game, hold down on the SELECT and down buttons and then click the START button on the screen.
![]() KODIFIREIPTVTip: To open the Retroarch settings, press the SELECT and START buttons on your controller at the same time.
KODIFIREIPTVTip: To open the Retroarch settings, press the SELECT and START buttons on your controller at the same time.
How to Restore Your SNES Back to Its Default Settings
This SNES Classic Hack is 100% reversible so it is easy to set the device back to its default settings.
Step 1
Turn OFF the SNES Classic and pull the USB cord out of the power adapter. Then plug the cord into your computer.
Step 2
Turn ON your SNES Classic and wait for 10 to 20 seconds for it to be recognized within Hakchi CE. Once the button at the bottom left corner of the window turns to green ![]() , the connection is successful.
, the connection is successful.
Step 3
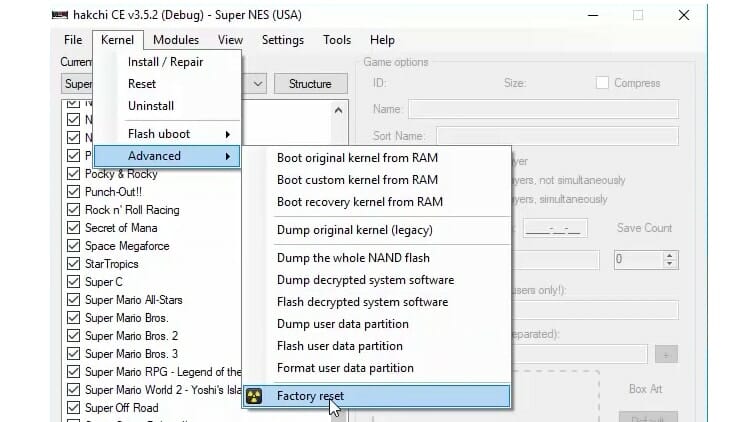
On the Hakchi CE main menu, click Kernel > Advanced > Factory reset.
Step 4
A pop-up message appears. Click Yes.

Step 5
Wait for the process to be completed.

Click Ok once the reset is done.

Your SNES device should work exactly the way it did when you first pulled it out of the box.
Related
This page includes affiliate links where KODIFIREIPTVmay receive a commission at no extra cost to you. Many times, you will receive a discount due to the special arrangements made for our visitors. I will never promote something that I personally don’t use or recommend. Purchasing through my links directly supports KODIFIREIPTVwhich keeps the content and tools coming. Thank you!
The team at Kodi Fire IPTV strongly suggests that you use a VPN at all times.
Be it for browsing, watching Kodi, watching IPTV or anything else – the one that we recommend is Quad VPN. They provide you with very fast speeds, while keeping you protected. They can also unblock most streaming sites in the US and UK!!
Grab your own Quad VPN and regain your online privacy now!
")


