
How To Install and Use iMPlayer IPTV Player on Firestick and Android TV
This step by-step-tutorial will provide you with instructions to Install and Use iMPlayer on Firestick, Fire TV, and Android TV Box.
iMPlayer is a new IPTV Player that works well with IPTV Services that provide an M3U URL or Xtreme Codes API.
This is a great addition to other IPTV Players such as TiviMate or IPTV Smarters.
Check with your current IPTV provider on whether they grant access to their M3U URL prior to going through this guide.
You can usually find this in your welcome email, support documents, or online discussion board that most IPTV services offer for their subscribers.
There is both a premium version and a free version of the iMPlayer software available for use. However, KODIFIREIPTVsuggests purchasing a premium account for a much better experience.
The premium option includes the following features not available with the free version:
Recording
Adding channels to Favorites
Catch-up
Rewinding feature
Multiview
Locking channels
Support for multiple playlists
Customizable TV Guides
Manual Channels sorting
Like most IPTV players, without using the premium version there isn’t much sense in using this app.
iMPlayer Screenshots
We suggest first installing the free app via the instructions below. If you like the app, you can register for the premium version and we cover that below as well.
Install iMPlayer on Firestick/Fire TV and Android TV Box
In this example, I am installing the iMPlayer app on an Amazon Firestick 4K. We must side-load this application due to the fact that it isn’t available inside the Amazon App Store.
If you’re using an Android TV Box or NVIDIA Shield, you can install the Downloader App by using the guide below.
How to Install Downloader App on Android TV Box
Or even better, if you have the KODIFIREIPTVApp installed, it is available in the Rapid App Installer.
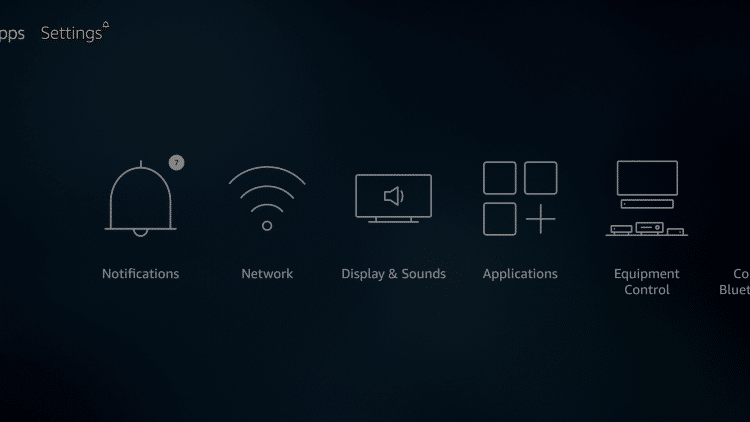
1. From the Main Menu scroll to hover over Settings.
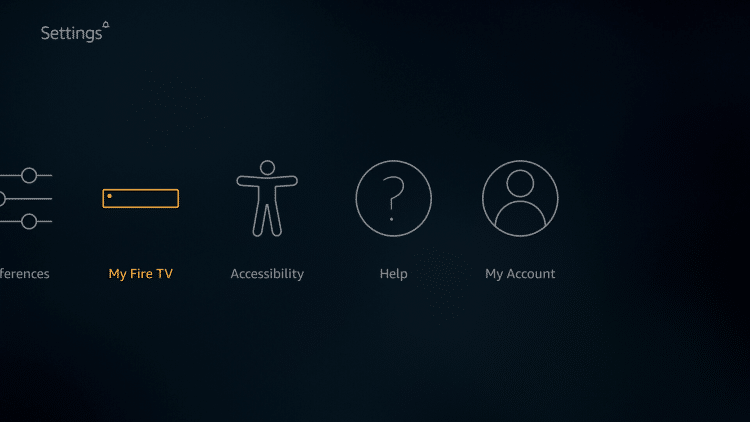
2. Click My Fire TV.
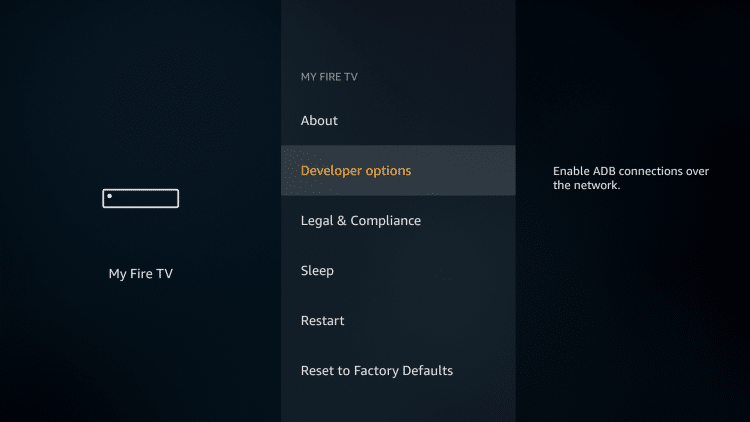
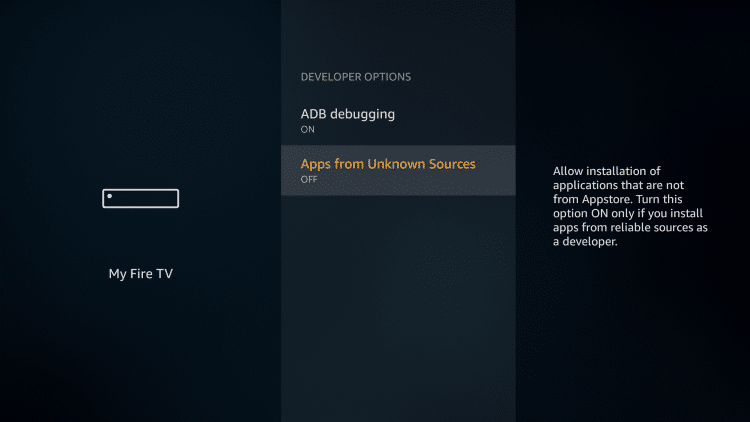
3. Choose Developer Options.
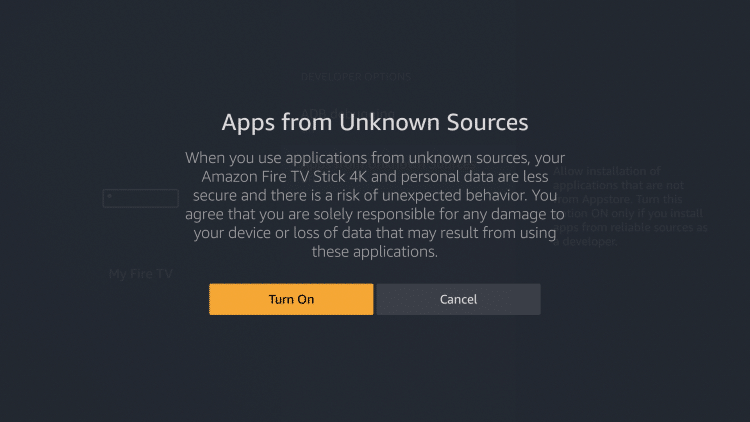
4. Click Apps from Unknown Sources.
5. Choose Turn On.
6. Return to the home screen and hover over the Search icon.
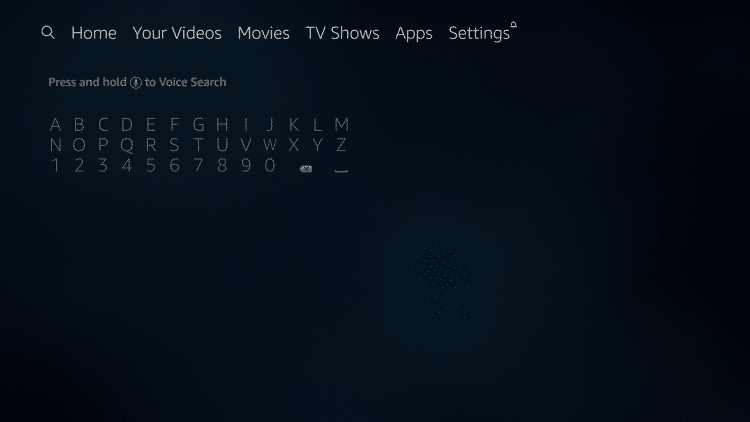
7. Type in Downloader.

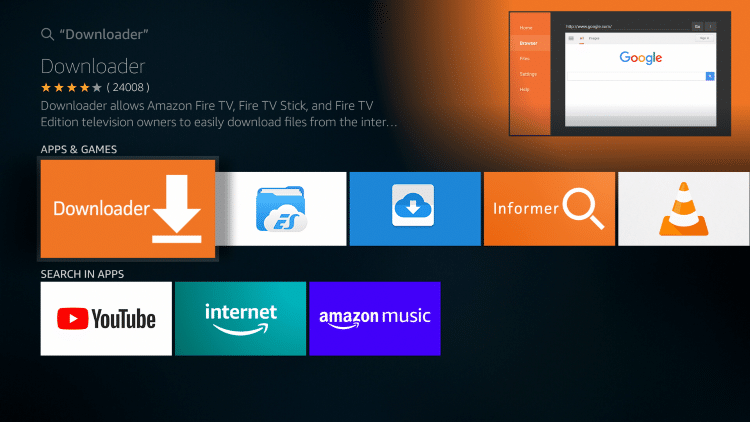
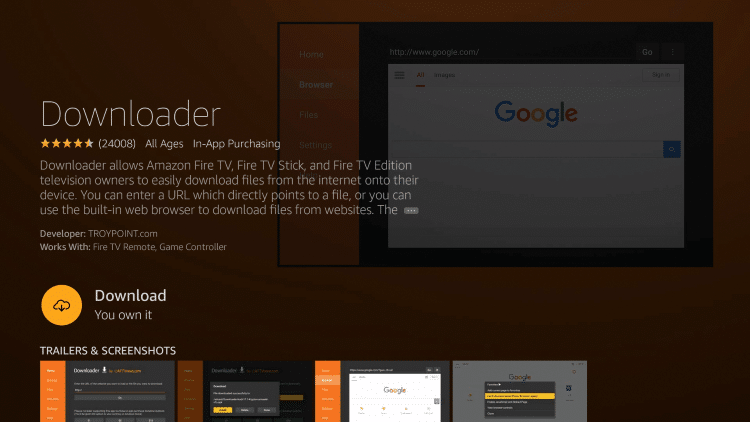
8. Select the Downloader app.
9. Click Download.
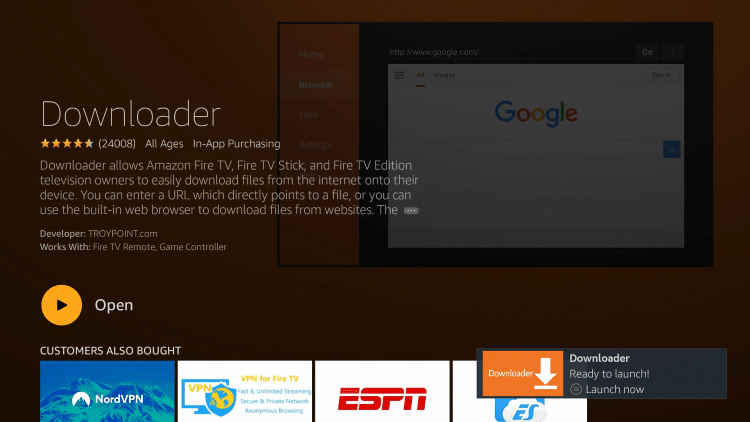
10. Click Open.
11. Select Allow if presented with this prompt.
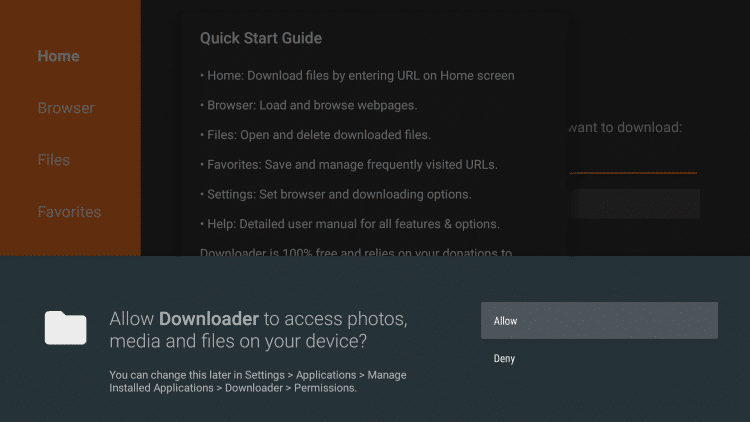
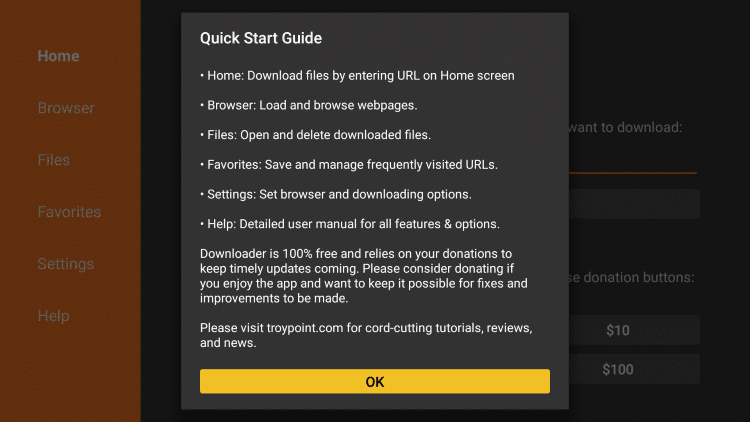
12. Click OK.
13. Click the search bar.

14. Type the following URL exactly as shown here: https://troypoint.com/im and click Go.
Important Note: this APK file is not hosted by TROYPOINT. This link is pointing to the installation file hosted at implayer.tv.

15. Wait for file to download.

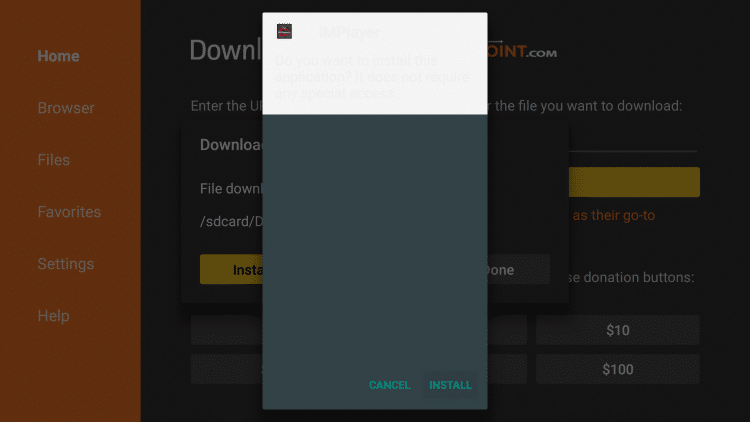
16. Click Install.
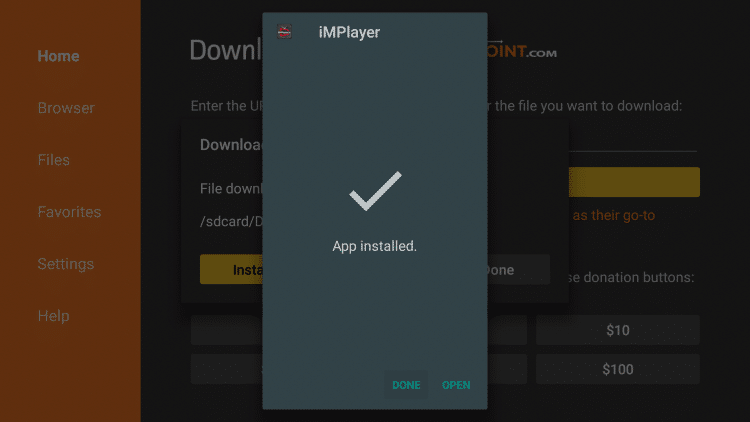
17. Click Done.
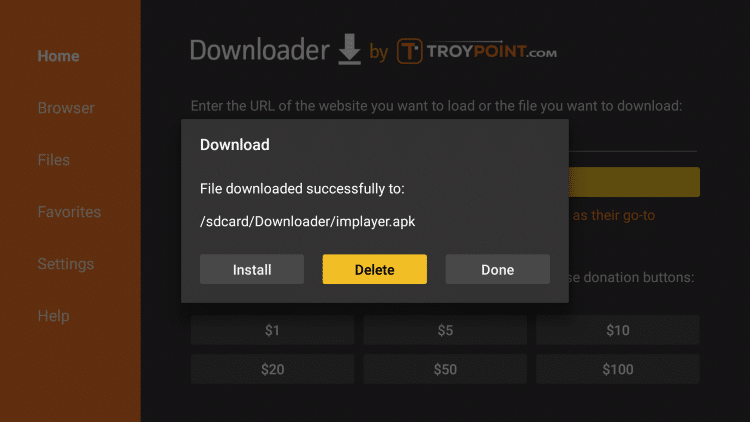
18. This will take you back to Downloader. Click Delete.
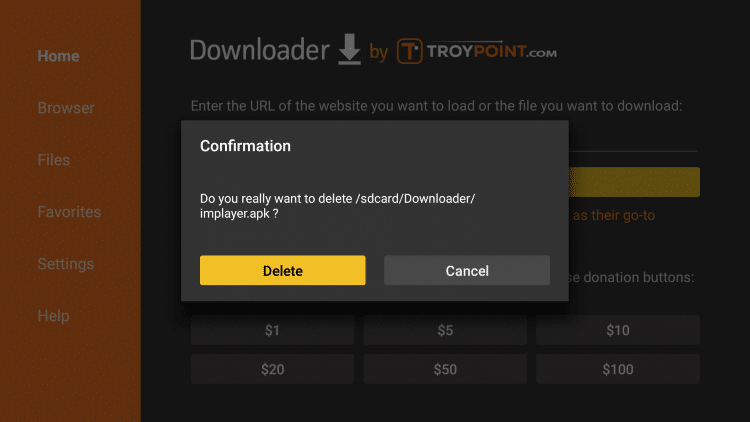
19. Click Delete again.
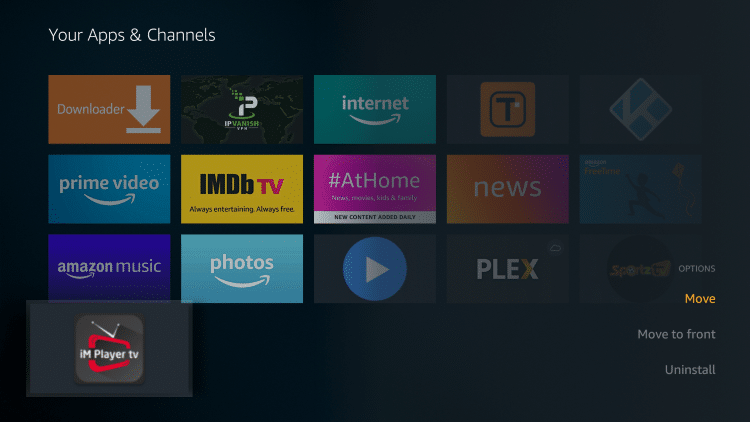
20. Hold down the home button on your remote and select Apps.

21. Scroll to the bottom and hover over iMPlayer. Click the Options button on your remote (three horizontal lines). Then select Move.
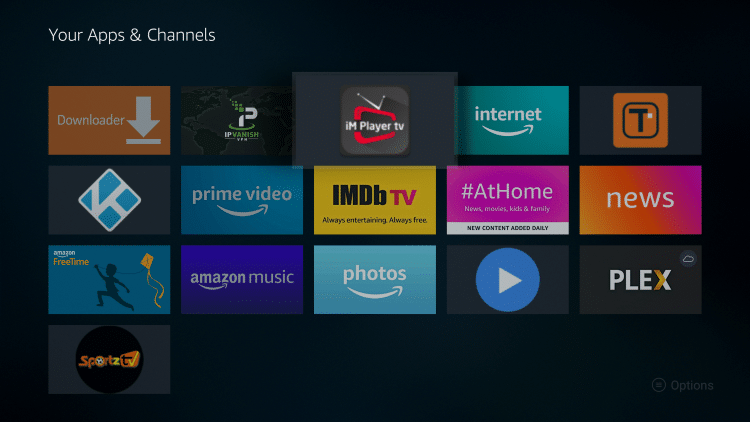
22. Drag iMPlayer to the top of your apps list and click to drop.
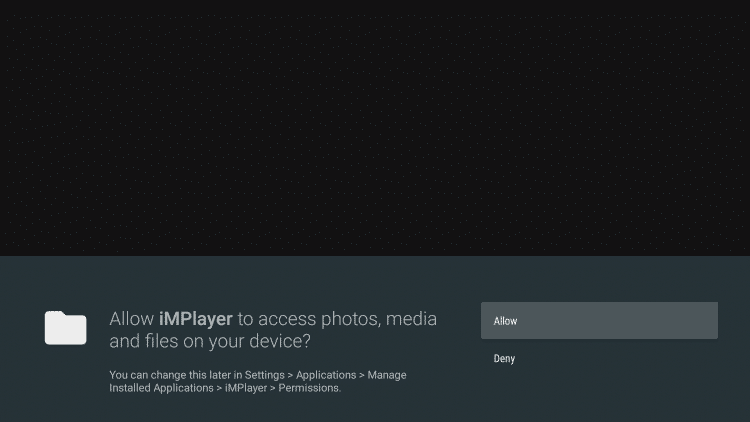
23. Launch iMPlayer and click Allow.
24. Choose whichever theme you prefer.

25. If prompted with an update click the Update button.
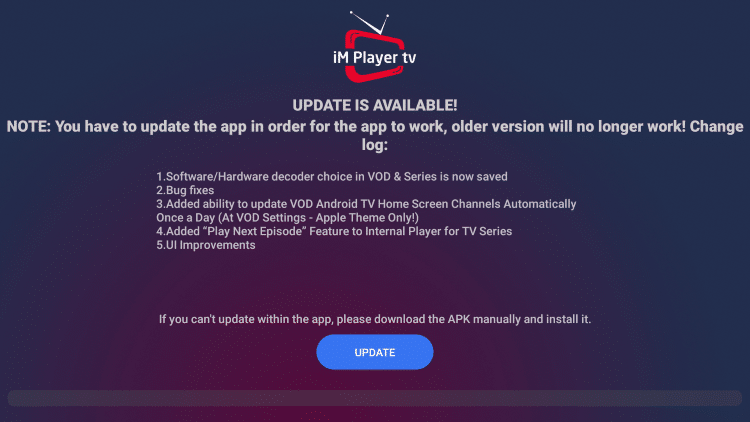
26. Wait a few seconds for iMPlayer to update.

27. Click Install.
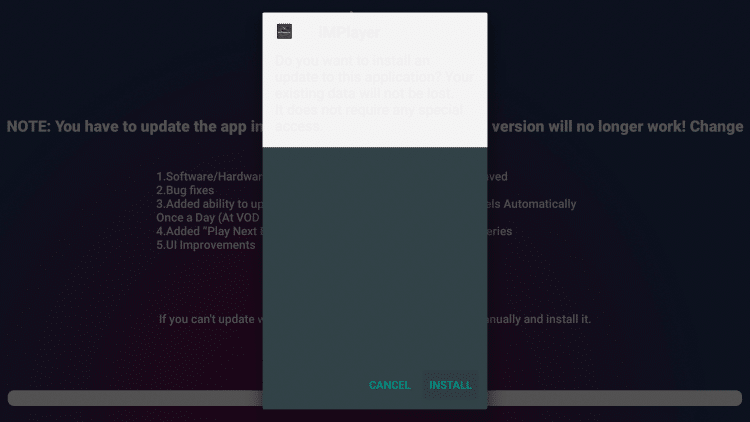
28. Click Done.

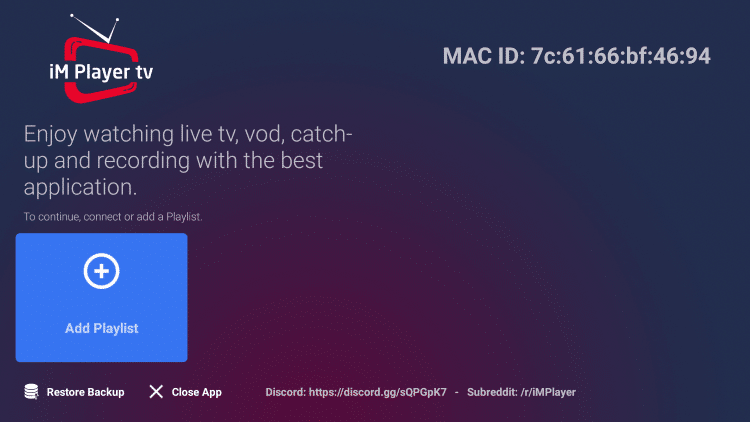
29. Relaunch the iMPlayer app.

30. That’s it! You have successfully installed iMPlayer. I suggest following further instructions below for setting up the IPTV player.
iMPlayer Setup
After installing the iMPlayer application on your device you will need to go through the setup process.
Follow our short guide below for setting up iMPlayer with your preferred IPTV service.
If you need an IPTV service, a simple search on YouTube or Google will provide you with hundreds of services to choose from.
1. On the home screen of iMPlayer click Add Playlist.
2. Once on this screen, you can either log in with an M3U URL or Xtreme Codes API.

Because these M3U URL’s are so long to type, we recommend using an API or Xtream Code if applicable.
Most M3U URLs require that you input your service username and password. You will usually see where these go inside the URL as they are indicated by “username=xxxx” & password=xxxx”.
You will input your username and password where the x’s are located.
Here is an example of an M3U URL. This is not a real M3U URL but this is how the structure typically looks.
http://liveiptvservice.org:86/get.php?username=xxxx&password=xxxx&type=m3u_plus&output=ts
3. For this example, we are connecting our IPTV account with iMPlayer using the Xtreme Codes API. If using Xtreme Codes API hover over and click Use XC Portal Login API in the upper right.
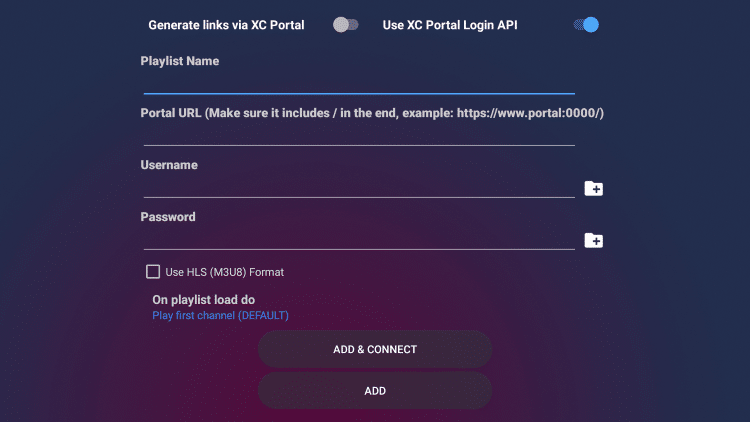
4. Enter in all of your account information and click Add & Connect.

5. Wait for the connection to your IPTV service to fully load.

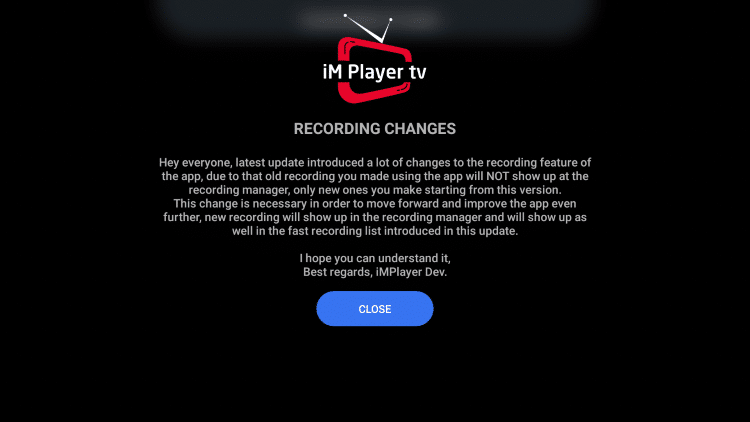
6. If this message appears just click Close.
7. Click Close again.
8. That’s it! You have successfully setup iMPlayer with your IPTV service.
Important Note: Many of the features within iMPlayer are not available for those who choose to use the free version.
For example, if you try adding a channel or channels to Favorites you will be prompted with the following message:
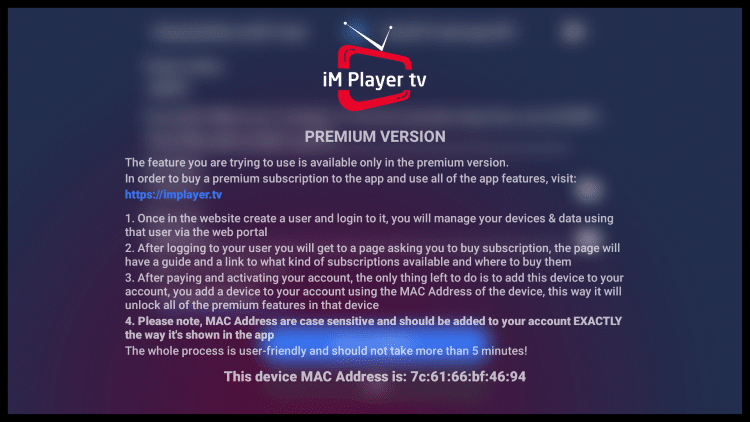
For those who wish to use the free version, simply click the back button on your remote to continue using iMPlayer.
If you purchase the premium option by using the website listed above – https://implayer.tv we can login for added benefits.
If you need to create an account, you can follow instructions below on how to do that.
WARNING! USE IPTV ONLY WITH A VPN
Your IPTV activity is actively tracked by your Internet Service Provider, addon devs, and government through your IP address.
Use IPTV and all streaming apps anonymously by using Quad VPN.
Quad VPN will encrypt your connection to the Internet and mask your IP address so you will remain 100% anonymous.
Your current IP Address is 35.221.15.14
LIFETIME DISCOUNT – ONLY $5 PER MONTH
Quad VPN backs their service with a 30-day money back guarantee.
Quad VPN allows you to use your account on unlimited Internet-connected devices
This special discount expires soon.
Click Here for Quad VPN Lifetime Discount
How to Sign Up for iMPlayer Premium Version
1. Visit the following URL – https://implayer.tv
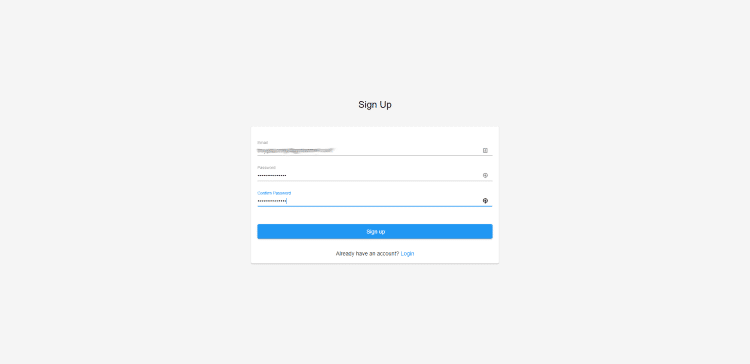
2. Click Sign up towards the bottom.
3. Enter in the required information (Email and Password) and click Sign up.
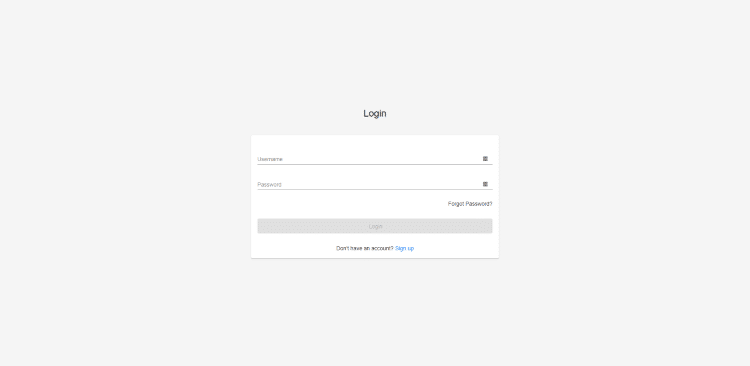
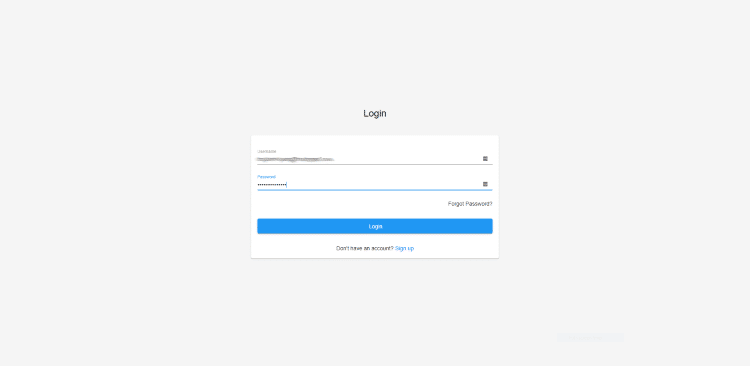
4. You are then directed back to the Login screen. Enter the same information you used to sign up and then click Login.
5. You are then directed to the iMPlayer dashboard. Notice the different subscription options available for 2, 3, 4, and 5 devices. Select whichever option you prefer.
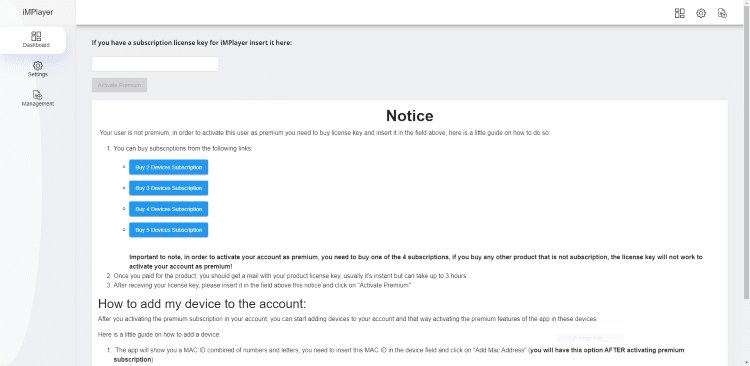
6. For this example, we chose the iMPlayer Premium Subscription 2 Devices option, which costs $18 as of this writing. Then click Buy Now.
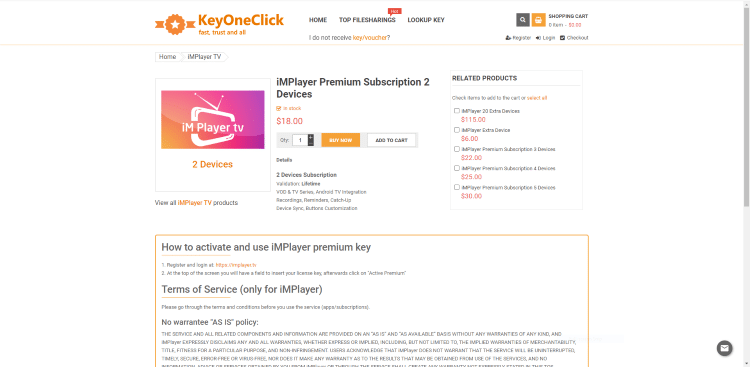
7. Enter in your Email Address along with a Full name, choose a payment method, then click Place Order.

8. Review the information then select Click to Pay with PayPal (or whatever payment method you selected).
That’s it! After completing the payment you have now signed up for the iMPlayer Premium version.
Important Note: You will need to make note of your device’s MAC Address (or MAC ID) in order to successfully integrate your iMPlayer Premium account.
Add Channels to Favorites
The iMPlayer Premium Version also allows users to create a list of your favorite channels. See the quick screenshot guide below on how to add Favorites within the app.
1. Within the iMPlayer channel menu, select any channel you prefer.

2. Press the OK button on your remote and you will notice the bottom menu appears.
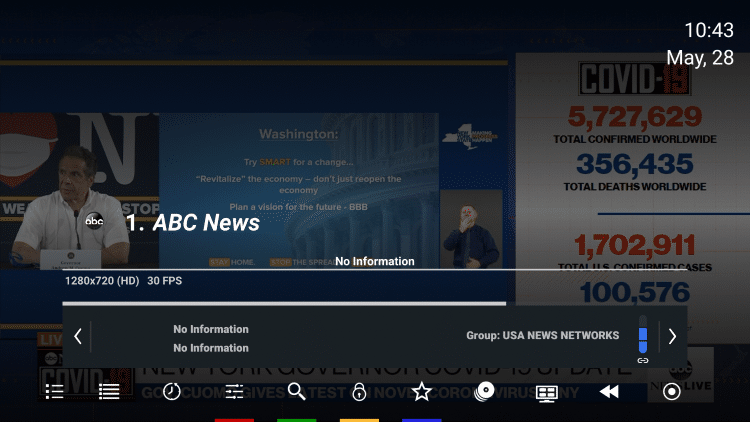
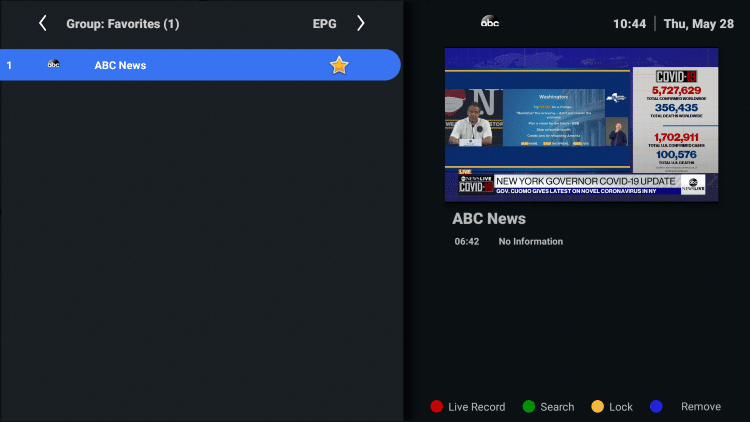
3. Locate the Favorites icon (star) and select it.
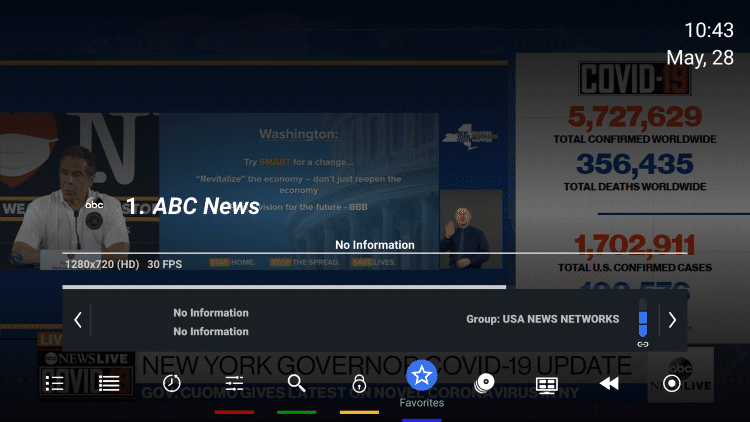
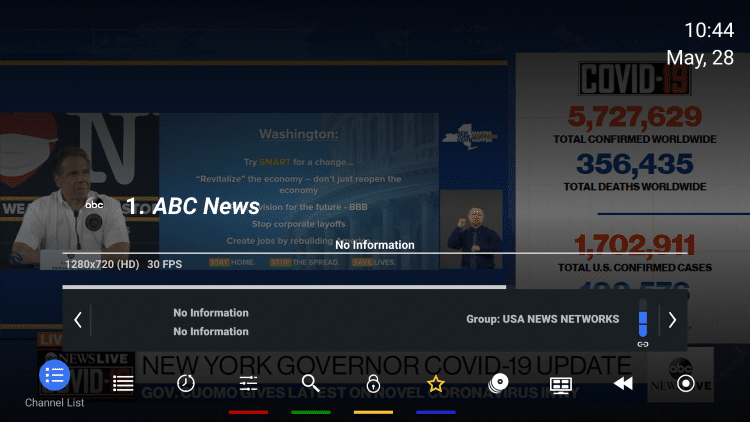
4. You will notice the Favorites icon turns to a gold color.

5. To locate your favorite channels, scroll left and select Channel List.
6. Within the left channel menu, scroll all the way up and select Favorites.
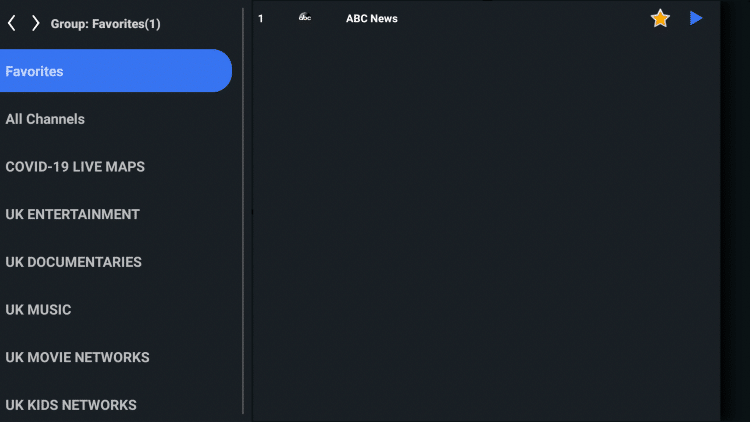
7. That’s it! Notice your selected channel is now located within your Favorites.
How to Record IPTV with iMPlayer
Another great feature included with the iMPlayer Premium version is the ability to Record Live TV.
Important Note: If you are using a Firestick or Android TV Box with minimal internal storage, we suggest using external storage to store IPTV recording files. We did this using an OTG Cable with a SanDisk USB 3.0 Flash Drive.
1. Within the iMPlayer channel menu, select any channel you prefer.
2. Click the OK button on your remote to launch the playback menu. Then scroll to the left and click Menu.

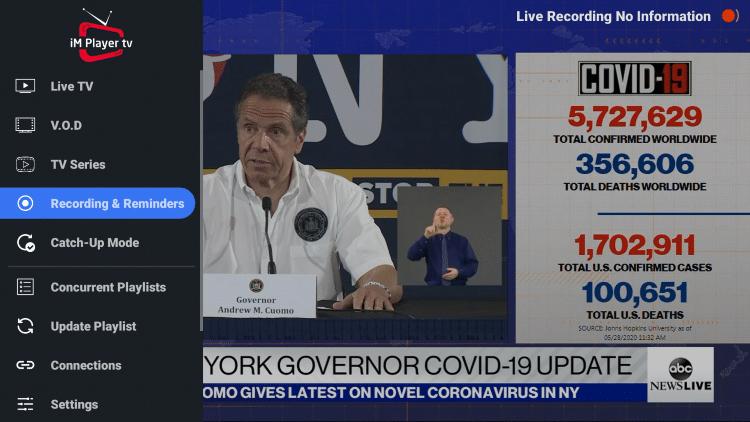
3. You will notice a menu appears on the left. Scroll down and select Recording & Reminders.
4. Then click Change Directory. This will allow you to save your recording files to the external USB storage.
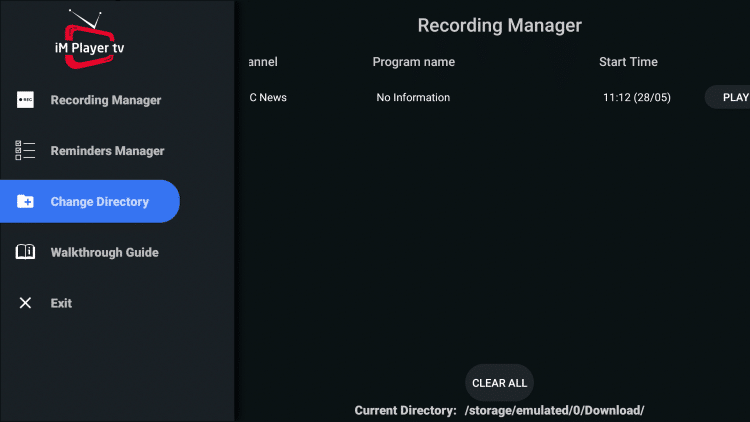
5. Click the second option that shows your external storage name.

6. Then click Accept.

7. Return back to your selected channel and Click the OK button to launch the playback menu. Then scroll to the right and select Record.
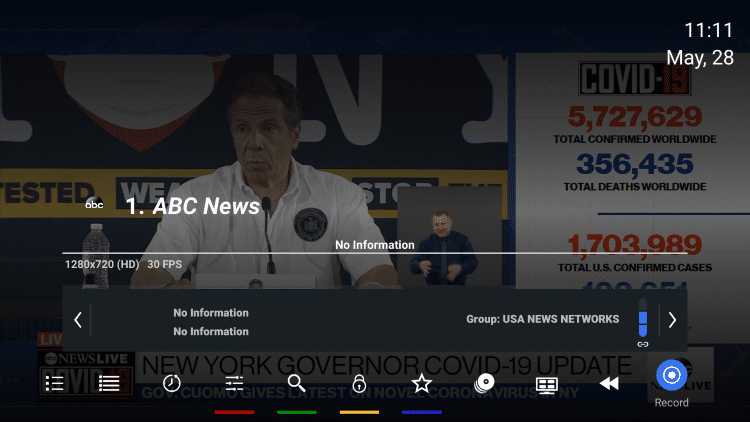
8. When this screen appears click Live Recording.

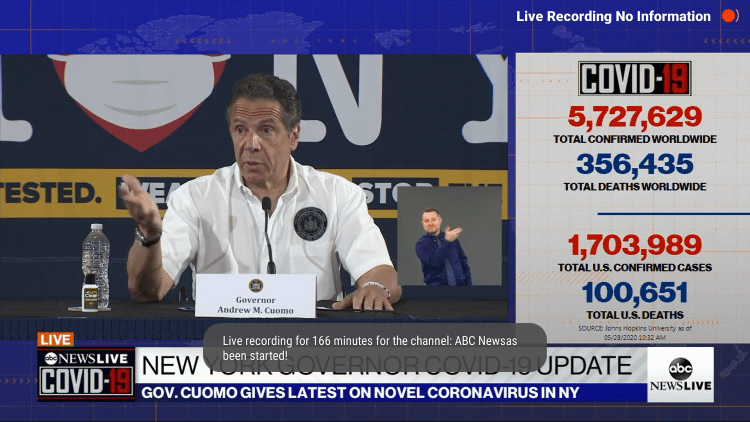
9. You will notice a message appear at the bottom saying your live recording has been started.
10. To view your recording, launch the playback menu again by clicking the OK button. Then select Menu.
11. Click Recording & Reminders.
12. Select Recording Manager.
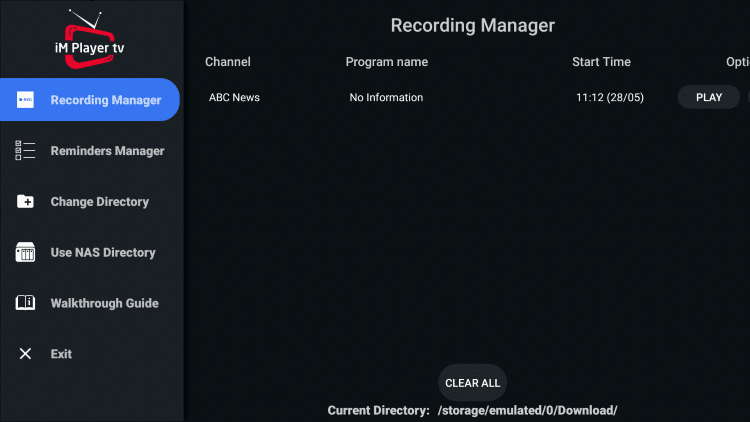
13. Within the Recording Manager, you are able to locate your recording files. Here you can play the recordings or remove them by clicking Clear All at the bottom.

That’s it! You now know how to record Live TV using iMPlayer.
How to Schedule Recordings
The best feature that sets iMPlayer apart from the other IPTV players is the ability to schedule recordings. This feature works great!
View the short screenshot guide below for how to schedule recordings within iMPlayer.
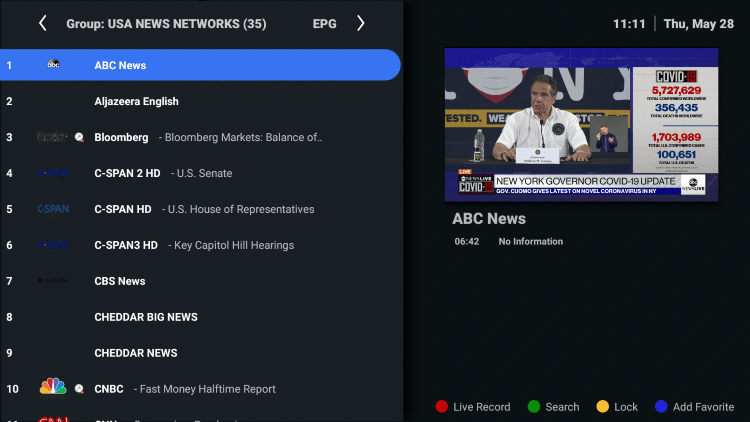
1. When viewing a channel, hit the OK button on your remote to open the playback menu. Select EPG.
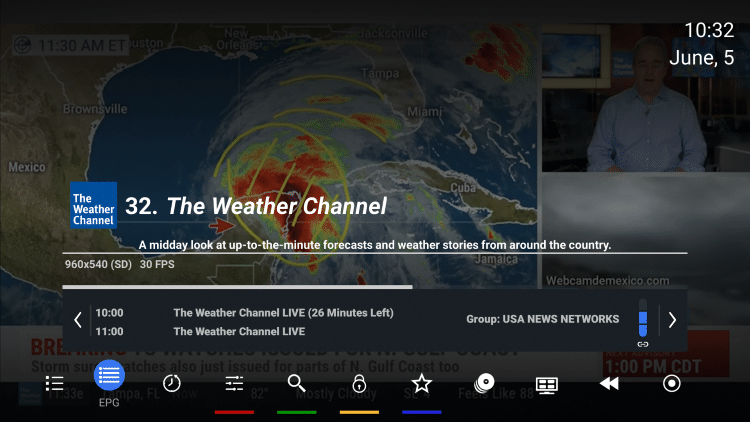
2. The EPG menu will then appear.
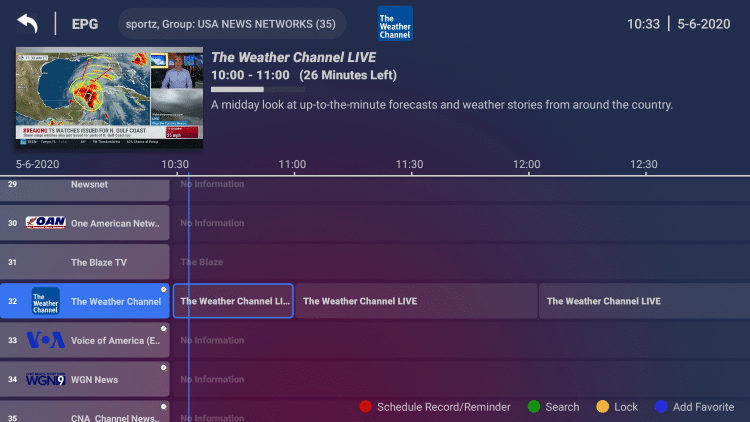
3. Hover over the channel you want to record and hold the OK button on your remote to launch the quick menu on the right. Then select Record.
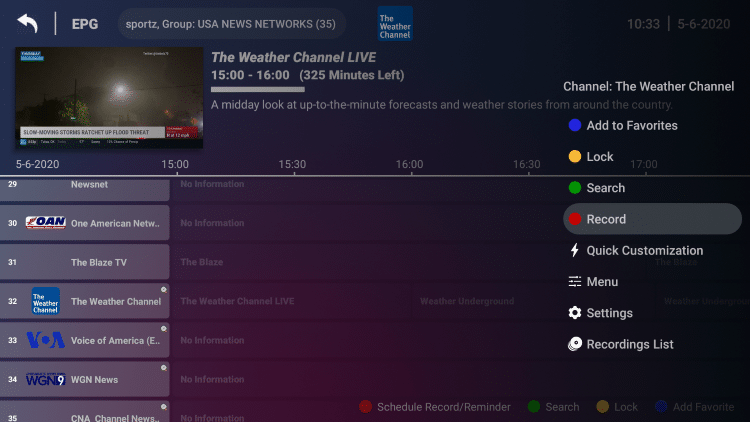
4. Choose Schedule Manual.

5. Next set your Manual Recording settings.
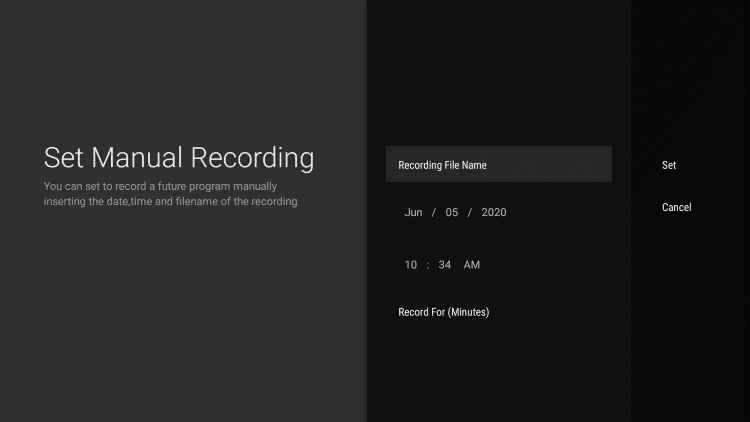
6. Enter a file name, date, time, and recording duration. Then click Set.
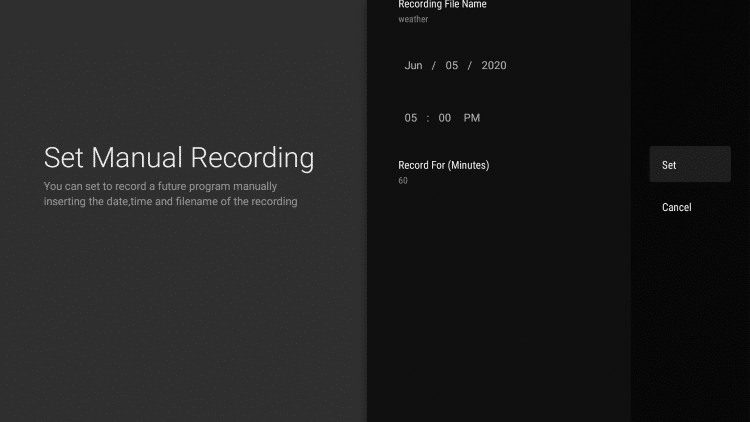
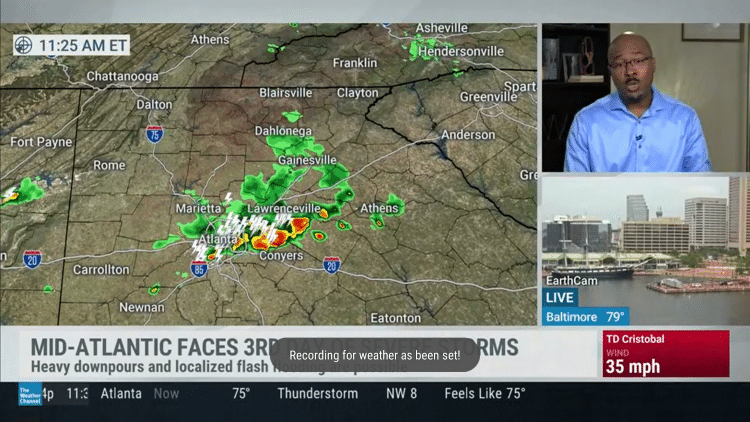
7. That’s it! You will notice a message saying “Recording for weather has been set!”
8. To view your scheduled recordings, return back to the playback menu and select the Menu option.

9. Select Recording & Reminders.
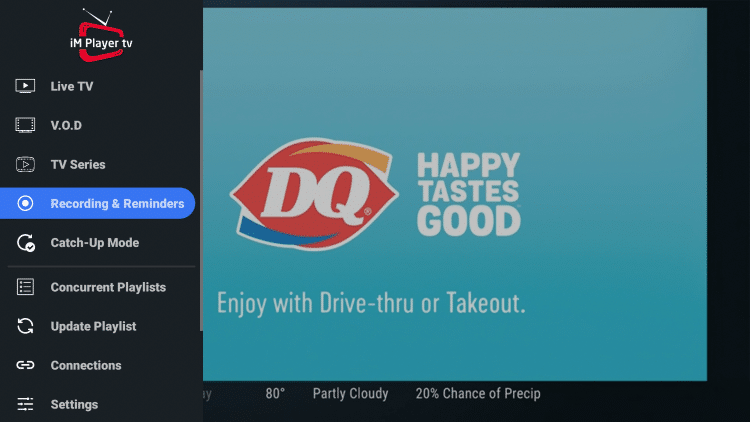
10. You will notice your scheduled recording appears within the Recording Manager.

iMPlayer Details & Features
After installing iMPlayer, you will notice the unique interface this IPTV player offers.
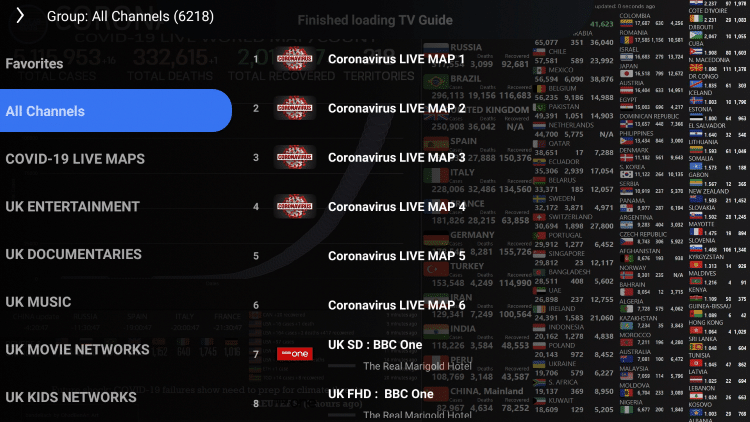
The menu bar on the left lists your Playlist Categories or “Groups” as they are referred to in the app. These can be hidden, removed, and managed all within the Settings.
This is a great way to eliminate any unwanted Channel lists that you don’t use or need.
![]() KODIFIREIPTVTIP: iMPlayer and dozens of other apps are available within the KODIFIREIPTVRapid App Installer.
KODIFIREIPTVTIP: iMPlayer and dozens of other apps are available within the KODIFIREIPTVRapid App Installer.
This app allows you to install the best streaming apps and tools in a matter of minutes rather than installing each APK one by one. Use the link below to access this free application.

KODIFIREIPTVRapid App Installer
Overall, iMPlayer is a great IPTV player that is compatible with the most popular IPTV services available. Give iMPlayer a try today!
 Warning! Protect Yourself With A VPN
Most cord-cutters use a VPN and rightfully so.
The free streaming applications, addons, and paid IPTV services that you use are usually hosted on insecure servers.
Without a VPN, your IP Address is being logged.
Your IP Address points back to your location and identity which compromises both your privacy and security.
Your current IP Address is 35.221.15.14 – When you use a VPN, your real IP address will be converted into an anonymous new one.
A VPN will provide you with an anonymous connection to the Internet.
This will prevent your Internet Service Provider, app/addon developers, government agencies, and any 3rd party from logging what you’re accessing online.
The most popular VPN among cord-cutters is Quad VPN due to their blazing fast speeds and zero log policy.
Its important to use a VPN that is fast since we are streaming large HD files. Its also crucial to find one that keeps no logs of what their subscribers access while online.
Setting up Quad VPN on your streaming device is simple!

Step 1 Register for an Quad VPN account by clicking the link below.
This exclusive link provides you with a hefty discount, only available to KODIFIREIPTVvisitors like you.
![]() Register for Quad VPN Account & Enjoy Lifetime Discount at Only $5 Per Month
Register for Quad VPN Account & Enjoy Lifetime Discount at Only $5 Per Month ![]()
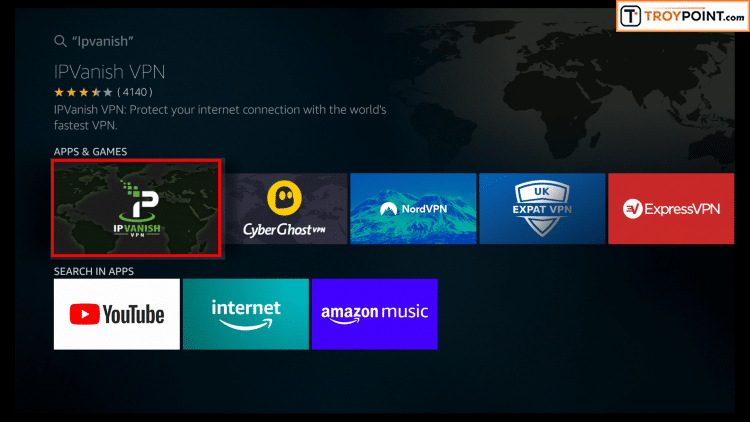
Step 2 – Hover over the search icon on your Firestick, Fire TV, or Fire TV Cube and type in “Quad VPN”
You may also find the Quad VPN App in the Google Play Store for those of you who are using Android TV Boxes, phones, and tablets.
 Step 3 – Click the Quad VPN option that appears.
 Step 4 – Click the Quad VPN icon under Apps & Games.
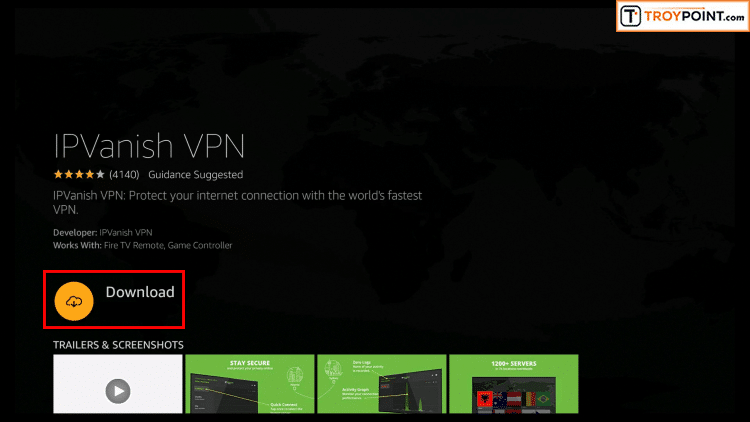
 Step 5 – Click Download.
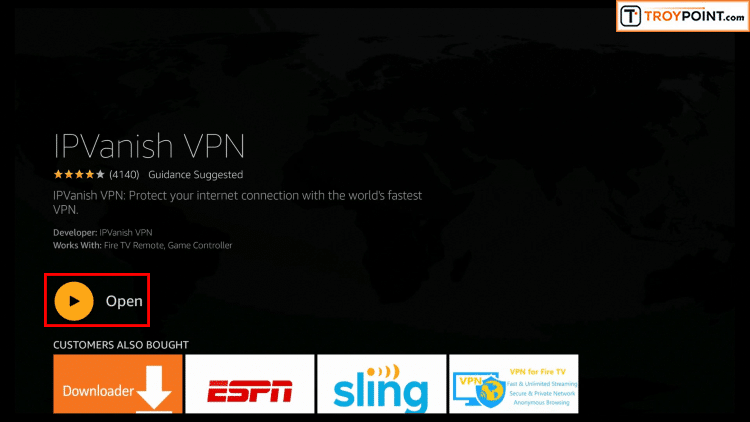
 Step 6 – Click Open.
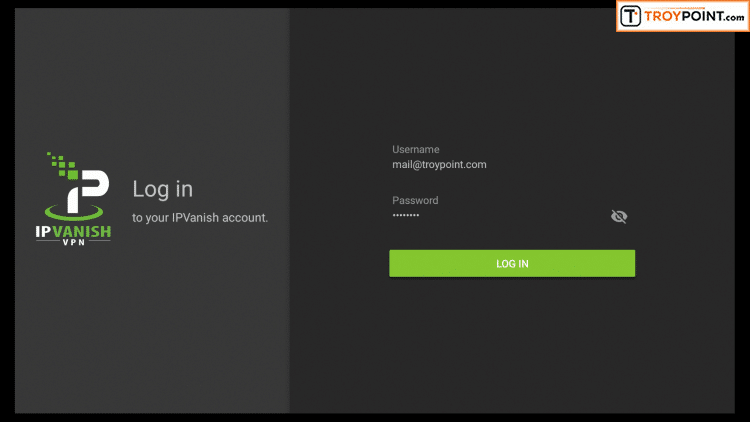
 Step 7 – Enter your username and password to login. Your username is the email that you used to register for Quad VPN service with and your password is automatically generated and emailed to you.
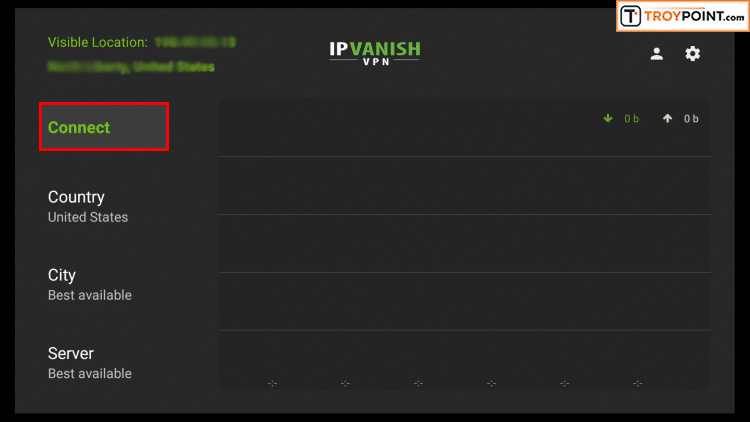
 Step 8 – Click Connect button.
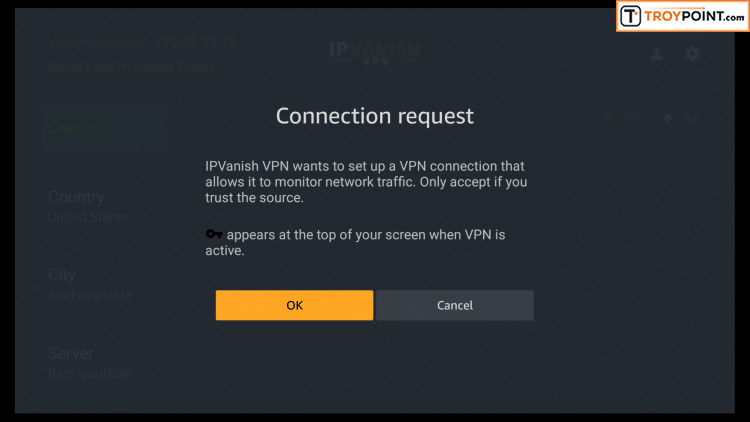
 Step 9 – Click OK for Connection request if it appears.
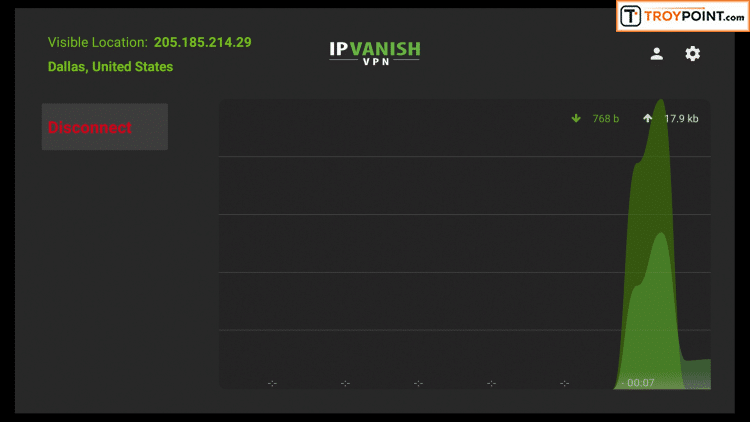
 Step 10 – You will notice that your IP Address changes along with location of connection. You are now operating anonymously through your device.
Click the Home Button on your remote and the VPN will remain running in the background.
 Congratulations! You are now protected by a VPN which means everything that you stream or access through your Firestick or Android TV Box is hidden from the rest of the world.
If you ever need to stop the VPN service, simply re-launch the application and click the DISCONNECT button.
Please follow and like us:
The team at Kodi Fire IPTV strongly suggests that you use a VPN at all times.
Be it for browsing, watching Kodi, watching IPTV or anything else – the one that we recommend is Quad VPN. They provide you with very fast speeds, while keeping you protected. They can also unblock most streaming sites in the US and UK!!
Grab your own Quad VPN and regain your online privacy now!
")


