

How to Format USB Drive to FAT32 on Windows PC and Mac Computers

This page includes affiliate links where KODIFIREIPTVmay receive a commission at no extra cost to you. Many times, you will receive a discount due to the special arrangements made for our visitors. I will never promote something that I personally don’t use or recommend. Purchasing through my links directly supports KODIFIREIPTVwhich keeps the content and tools coming. Thank you!
This step-by-step guide shows How to Format USB to FAT32 on any Windows PC or Mac computer.
The process of formatting a USB drive to the FAT32 format is simple and takes less than five minutes.
We hear of many individuals struggling to connect their USB drives to Amazon Firesticks and other Android-powered devices.
Legal Notice: KODIFIREIPTVwill not be held liable for data breaches, infected/hacked devices, or ISP logging caused by using unverified 3rd party applications, IPTV Services, addons, or streaming websites. You should protect yourself with a VPN when using these questionable sources.
CLICK HERE FOR BEST VPN
The main reason for this is because they haven’t formatted their devices as FAT32.
FAT32 stands for “File Allocation Table” with 32 referring to the 32-bit version of the FAT file system.
The FAT32 format is one of the most popular formats used on USB drives, external hard drives, and memory cards to ensure compatibility between all platforms.
![]() IMPORTANT NOTE: When you format a USB drive you are erasing everything. If you have important files on your USB drive make sure you back them up prior to formatting as FAT32.
IMPORTANT NOTE: When you format a USB drive you are erasing everything. If you have important files on your USB drive make sure you back them up prior to formatting as FAT32.

The Windows PC disk utility only allows for formatting as FAT32 if a USB drive is 32GB or smaller. This tutorial will show you how to get around that constraint.
We also show you how to use Disk Utility in Mac computers to format any size of the USB drive as FAT32.
![]() KODIFIREIPTVTIP: We suggest watching the video below for important details about the FAT32 format.
KODIFIREIPTVTIP: We suggest watching the video below for important details about the FAT32 format.
In the tutorials below, we are using a SanDisk 3.0 USB Drive on a Windows 10 PC.
How to Format USB to FAT32 – Video Guide
![]() Troy’s Recommended VPN with Discount
Troy’s Recommended VPN with Discount
![]() Install VPN on Firestick/Android Guide
Install VPN on Firestick/Android Guide
![]() SanDisk 3.0 256 GB USB Drive
SanDisk 3.0 256 GB USB Drive
Format USB Drive to FAT32 on Windows PC
Follow the step-by-step screenshot guide below for formatting your USB drive to FAT32.
The first example is for those using a 32GB USB drive and following that you will find instructions for a 256GB USB drive.
32GB USB Drive
1. Insert your USB drive into your Windows PC and Windows File Explorer should automatically open.

2. Locate and click your USB drive. In my case, the USB drive is labeled “SANDISK32.”
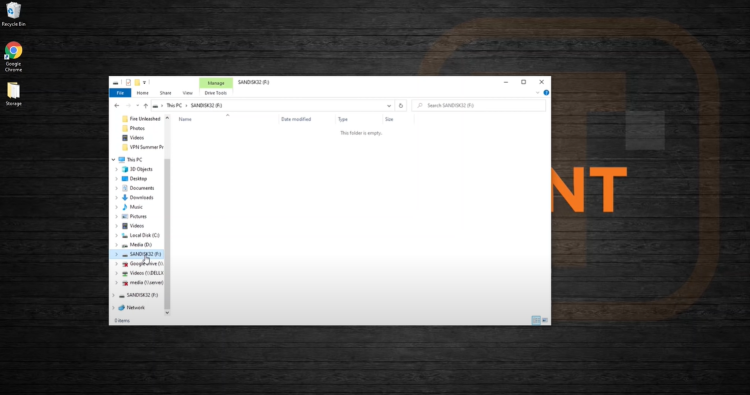
3. If your USB drive is 32GB or less, you can easily format your drive through Windows Explorer.
To do this simply right-click your drive and then left-click Format.

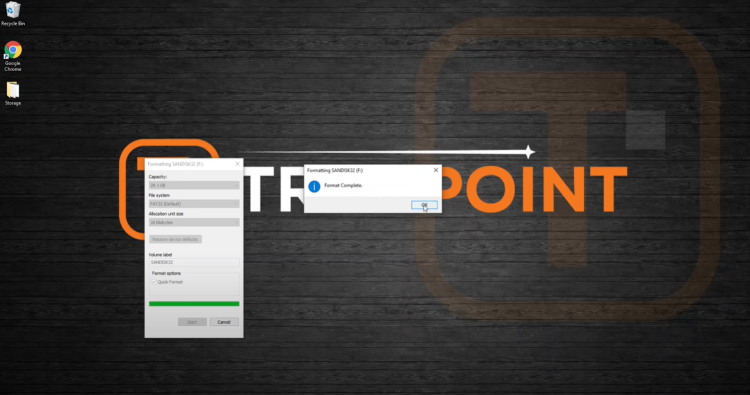
4. Change your File system from “exFAT” to “FAT32” from the dropdown menu. Then click Start.

5. You will be prompted with a warning message. As mentioned previously, changing your USB drive to the FAT32 format will erase everything. Click OK.

6. The format has been completed. This disk is now in the FAT32 file system. Click OK.
7. Next move your cursor to the bottom right-hand corner and click the up arrow. Then click the USB icon.

8. Then select “Eject Cruzer Glide.”
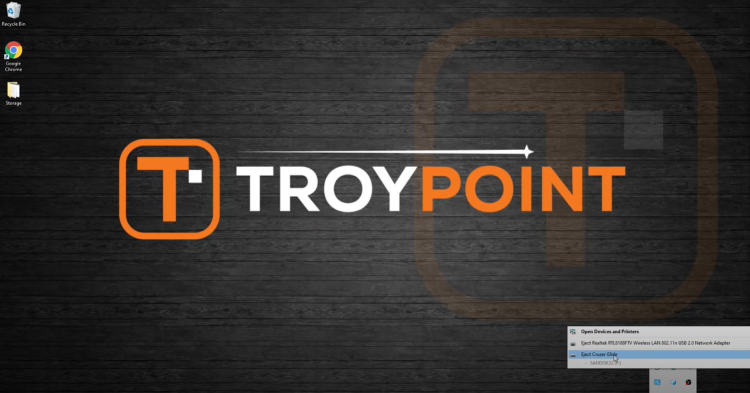
9. Now you can safely remove your USB drive.

That’s it! Your 32GB USB drive is now formatted to FAT32. Continue below for those using a 256GB USB drive.
256GB USB Drive
1. Insert your 256GB USB drive into your Windows PC and Windows File Explorer should automatically open.

2. Right-click your drive from the menu and then left-click Format. In this case, the USB drive is labeled “SANDISK32.”
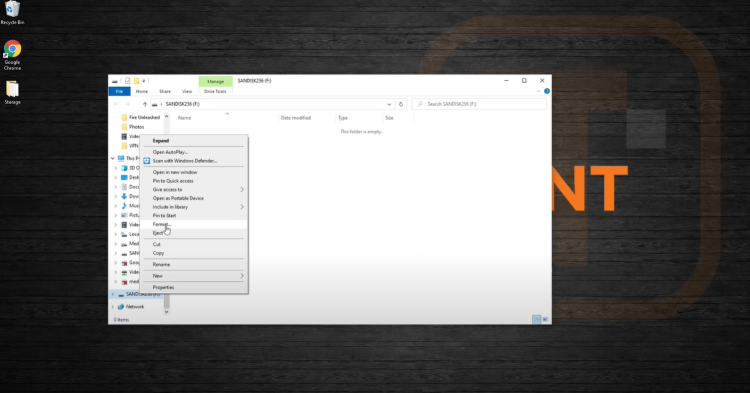
3. Click File System and you’ll notice that FAT32 isn’t available within this dropdown list.
Note: This is because Windows won’t format drives larger than 32GB, at least not through this basic formatting tool.

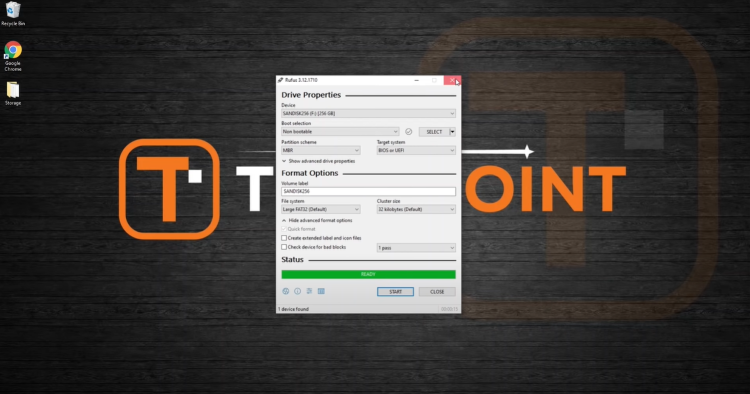
4. To work around this issue, we need to install a free drive utility called “Rufus.”
Visit the official website for Rufus, which is https://rufus.ie.

5. Scroll down and select the latest Rufus release which is 3.12 as of this writing.

6. Save this to your Downloads folder and click Save.

7. When Rufus is finished installing click the Rufus icon in the bottom left corner and click Yes when this message appears.

8. After the Rufus tool opens, click Boot Selection.

9. Choose Non-bootable from the dropdown menu.
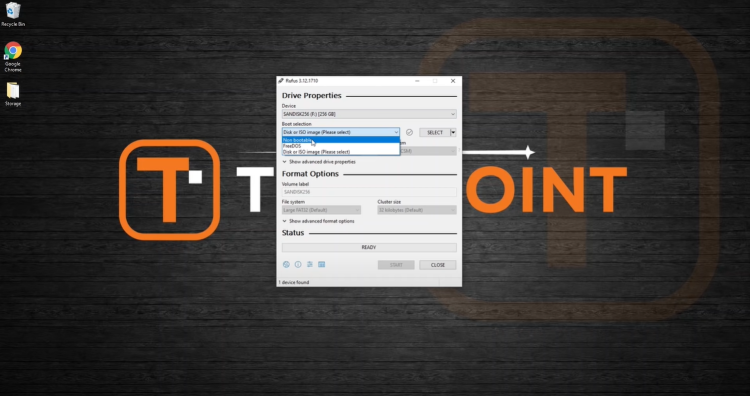
10. Then click File System and you will notice the Large FAT32 format is now available. Choose that.

11. Next click “show advanced format options” and uncheck the box that says “Create extended label and icon files.”
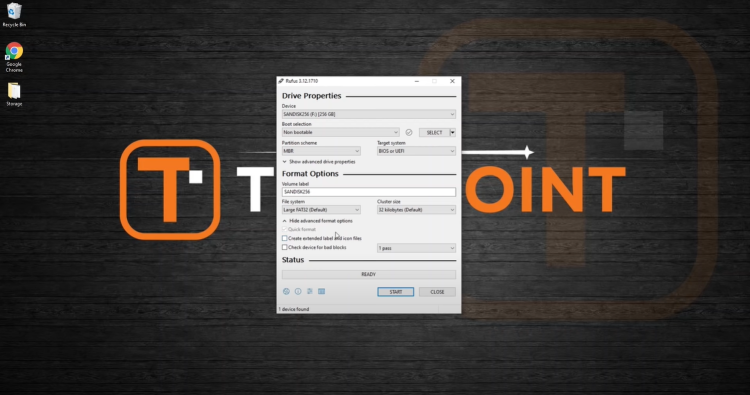
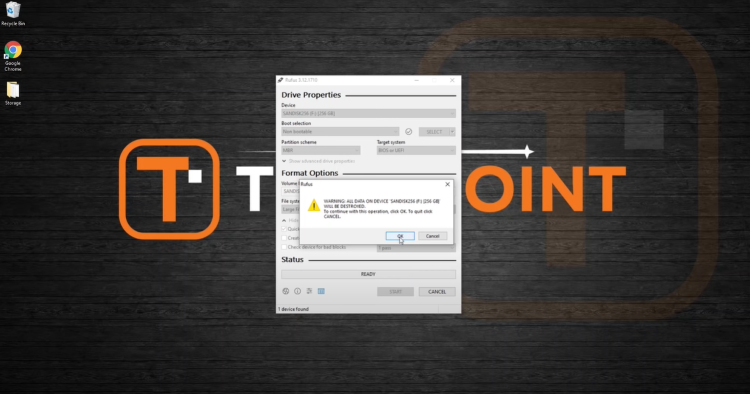
12. Then click the Start button.

13. When this warning message appears click OK.
14. That’s it! Your 256GB USB drive is now formatted as FAT32. Exit out of the Rufus program.
15. You can now safely eject your 256GB USB drive by clicking the icon on the bottom right of the screen. Choose Eject Ultra.

Format USB Drive to FAT32 on Mac Computers
For those using a Mac computer, follow the step-by-step instructions below for formatting any USB drive to FAT32.
The nice part about formatting USB drives on a Mac computer is its built-in disk utility tool. This will allow you to easily format any size USB drive to FAT32.
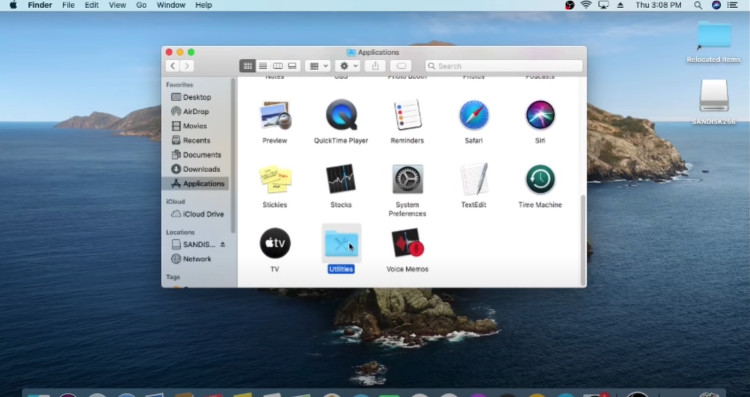
1. Open and click Applications from the left menu.

2. Open the Utilities folder.
3. Click Disk Utility.

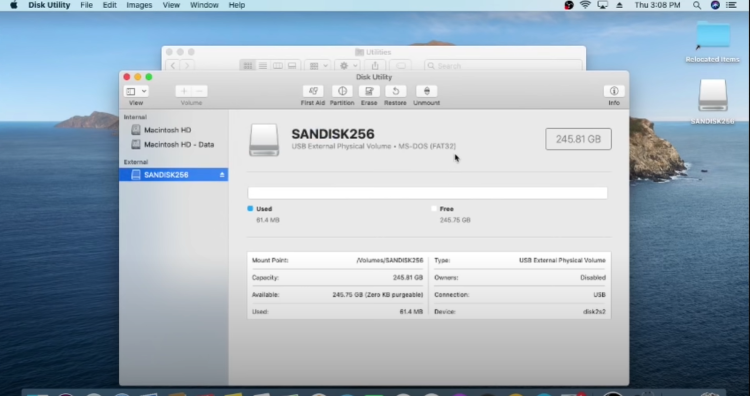
4. Highlight your USB Drive.

5. Then click Erase in the top menu.

6. Change the format to MS-DOS (FAT) which is actually FAT32.

7. Then click the Erase button.

8. Next click Done.

9. You will notice the USB drive is now formatted to FAT32.
10. As seen in the screenshot below, click the Eject button next to Drive prior to removing your USB drive from your Mac computer.

That’s it! You have successfully formatted your USB drive as the FAT32 format on your Mac computer.
After your USB drive has been successfully formatted to FAT32 you should now be able to use it on Android-powered devices and other systems.
The FAT32 format is an old file system and is recognizable by most Streaming Devices, phones, tablets, and computers.
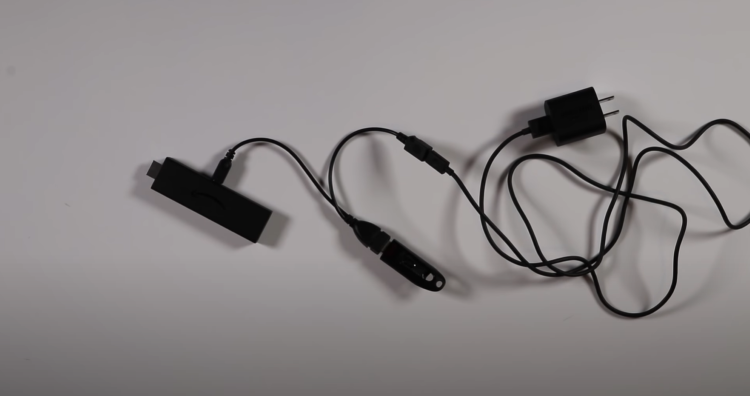
Using a USB drive with an OTG cable is a great way to Expand Storage on a Fire TV Stick.
This is popular among those using TiviMate and other IPTV players for Recording IPTV.
Best IPTV Players
For more popular streaming tutorials, check out our guides below:
For more tech and streaming tutorials be sure to sign up for the KODIFIREIPTVAdvisor with updates weekly.
This Advisor provides all the best cord-cutting tips to get the most out of your favorite streaming devices and more. CLICK HERE or link below for TROYOPINT Advisor Subscription:
KODIFIREIPTVAdvisor
Frequently Asked Questions
How do you format a USB drive to FAT32?
You can format any size USB drive to FAT32 on both a Windows PC and Mac computer by following this step by step guide.
What is FAT32?
FAT32 stands for File Allocation Table with 32 referring to the 32-bit version of the FAT file system.
Why do you need the FAT32 format on a USB drive?
Using the FAT32 format on your USB drive will allow you to pair it with Android-powered devices and other systems.
Will changing the USB drive to FAT32 erase all files?
Yes. Changing the format on a USB drive will erase all files. It’s important to back up any important files prior to changing to FAT32 format.
Related
The team at Kodi Fire IPTV strongly suggests that you use a VPN at all times.
Be it for browsing, watching Kodi, watching IPTV or anything else – the one that we recommend is Quad VPN. They provide you with very fast speeds, while keeping you protected. They can also unblock most streaming sites in the US and UK!!
Grab your own Quad VPN and regain your online privacy now!
")


